Introduction
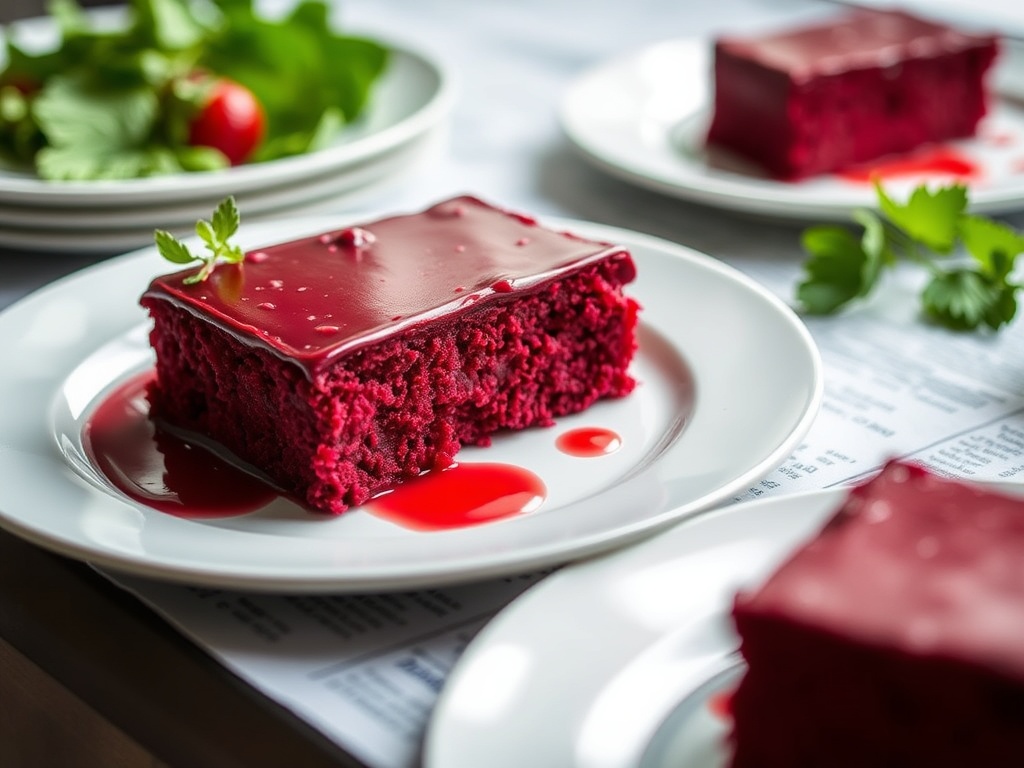
Prepare to be captivated by a dessert that is as stunning to behold as it is delightful to taste: The Ruby Velvet Bake. This isn’t just any cake; it’s a showstopper, a culinary masterpiece that elevates the classic red velvet to a new echelon of elegance and flavor. Imagine slicing into a confection where layers of incredibly moist, tender cake reveal a breathtaking, deep ruby hue, perfectly complemented by a cloud of tangy, sweet cream cheese frosting. Each bite is a symphony of textures and tastes, a harmonious blend of subtle cocoa, vanilla, and that unmistakable velvet softness that melts in your mouth.
The Ruby Velvet Bake is more than just a dessert; it’s an experience. It draws inspiration from the beloved red velvet, but takes it a step further, emphasizing a richer, more profound color and an even more refined texture. This cake is designed to impress, making it the quintessential centerpiece for special occasions, holiday gatherings, or simply when you want to treat yourself and your loved ones to something truly extraordinary. It’s for the dessert lover who appreciates both beauty and substance, for the baker who enjoys the artistic process, and for anyone seeking to create unforgettable culinary memories.
What makes our Ruby Velvet Bake truly special lies in its meticulous balance of ingredients and techniques. We delve deep into achieving that vibrant, consistent ruby color without compromising on flavor, ensuring the cake remains moist and tender through the magic of buttermilk and precise baking. The frosting, a luscious cream cheese concoction, is perfected to be light, fluffy, and just the right amount of tang, providing the ideal counterpoint to the cake’s subtle sweetness. Get ready to bake a cake that looks like a jewel and tastes like a dream.
Nutritional Information
Per serving (approximate values):
- Calories: 480
- Protein: 5g
- Carbohydrates: 65g
- Fat: 24g
- Fiber: 1g
- Sodium: 350mg
Ingredients
For the Ruby Velvet Cake:
- 2 ½ cups (300g) all-purpose flour, sifted
- 1 ½ cups (300g) granulated sugar
- 1 tablespoon unsweetened cocoa powder (natural, not Dutch-processed)
- 1 teaspoon baking soda
- ½ teaspoon salt
- 2 large eggs, at room temperature
- 1 ½ cups (360ml) buttermilk, at room temperature
- ½ cup (120ml) vegetable oil (or other neutral oil)
- 1 teaspoon vanilla extract
- 1 tablespoon distilled white vinegar
- 2-3 teaspoons high-quality gel red food coloring (e.g., Wilton “No-Taste Red” or Americolor “Super Red”), or 2-3 tablespoons beetroot powder for natural coloring (note: beetroot powder may impart an earthy flavor and less vibrant color)
For the Cream Cheese Frosting:
- 16 ounces (450g) full-fat cream cheese, softened
- 1 cup (226g) unsalted butter, softened
- 4-5 cups (480-600g) powdered sugar, sifted, plus more if needed
- 2 teaspoons vanilla extract
- Pinch of salt
Instructions
- Prepare Your Pans: Preheat oven to 350°F (175°C). Grease and flour two 8-inch round cake pans, or line the bottoms with parchment paper and grease the sides.
- Combine Dry Ingredients: In a large mixing bowl, whisk together the sifted flour, granulated sugar, cocoa powder, baking soda, and salt. Ensure there are no lumps and the ingredients are well combined.
- Combine Wet Ingredients: In a separate medium bowl, whisk together the room temperature eggs, buttermilk, vegetable oil, and vanilla extract.
- Add Color: In a small bowl, combine the distilled white vinegar and the gel red food coloring (or beetroot powder). Stir until the color is fully dissolved and vibrant. This method helps to evenly disperse the color throughout the batter.
- Combine Wet and Dry: Pour the wet ingredient mixture into the dry ingredient mixture. Add the vinegar-color mixture. Using an electric mixer on low speed, mix until just combined and smooth. Be careful not to overmix; overmixing can lead to a tough cake. Scrape down the sides of the bowl as needed to ensure all ingredients are incorporated.
- Divide and Bake: Divide the batter evenly between the two prepared cake pans. Bake for 25-30 minutes, or until a wooden skewer or toothpick inserted into the center of the cakes comes out clean.
- Cool the Cakes: Once baked, remove the cakes from the oven and let them cool in their pans on a wire rack for 10-15 minutes. This allows the cakes to set and prevents them from breaking.
- Invert and Cool Completely: After 10-15 minutes, carefully invert the cakes onto the wire rack, remove the pans, and peel off any parchment paper. Let the cakes cool completely to room temperature before frosting. This is a crucial step; frosting a warm cake will cause the frosting to melt and slide off.
- Prepare the Cream Cheese Frosting: In a large mixing bowl, using an electric mixer, beat the softened cream cheese and softened butter together on medium speed until smooth and creamy, about 2-3 minutes.
- Add Powdered Sugar: Gradually add the sifted powdered sugar, one cup at a time, beating on low speed until incorporated, then increasing to medium speed until smooth.
- Finish Frosting: Add the vanilla extract and pinch of salt. Beat on medium-high speed for another 1-2 minutes until the frosting is light, fluffy, and well combined. Be careful not to overmix, as this can make the frosting too thin. If the frosting seems too soft, refrigerate it for 15-20 minutes to firm up slightly before use.
- Assemble the Cake: Place one cooled cake layer on your serving plate or cake stand. Spread about 1 to 1 ½ cups of cream cheese frosting evenly over the top of the first layer.
- Add Second Layer and Crumb Coat: Carefully place the second cake layer on top. Apply a thin layer of frosting all over the cake (top and sides). This is called a “crumb coat” and helps to trap any loose crumbs, creating a smooth surface for your final frosting. Refrigerate the cake for 15-20 minutes to set the crumb coat.
- Final Frosting and Decoration: Once the crumb coat is set, apply the remaining frosting to the top and sides of the cake, using an offset spatula or bench scraper to create a smooth finish. You can pipe decorative borders or swirls if desired.
- Garnish (Optional): Garnish with fresh berries, chocolate shavings, or a dusting of cocoa powder for an elegant finish.
Cooking Tips and Variations
Achieving the perfect Ruby Velvet Bake is an art, but with a few key tips, you’ll master it in no time. First, room temperature ingredients are non-negotiable for both the cake batter and the frosting. This ensures proper emulsification, leading to a smoother batter and a more stable, lump-free frosting. For the cake, make sure your eggs, buttermilk, and butter (if using in frosting) are out of the fridge for at least 30 minutes to an hour before you start. When measuring flour, spoon it into your measuring cup and then level it off with a straight edge; scooping directly from the bag can compact the flour, leading to an overly dense and dry cake.
The “ruby” color is best achieved with high-quality gel food coloring. While liquid food coloring can work, gel provides a much more intense hue with less liquid, preventing your batter from becoming too thin. If you’re using beetroot powder for a natural alternative, be aware that the color might be more muted, and it can introduce a subtle earthy flavor. To ensure even color distribution, mix the gel coloring with the vinegar before adding it to the wet ingredients. This helps prevent streaks and ensures a uniform ruby shade throughout your cake.
For the frosting, full-fat cream cheese is essential for stability and flavor. Low-fat versions tend to be too watery and can result in a runny frosting. Also, be mindful not to overmix your cream cheese frosting once the powdered sugar is incorporated. Overmixing can break down the cream cheese, making the frosting loose and difficult to work with. Beat until just combined and fluffy. If your frosting does become too soft, a quick chill in the refrigerator for 15-20 minutes can help it firm up.
Sifting dry ingredients is a small step that makes a big difference. It aerates the flour, prevents lumps, and ensures that leavening agents like baking soda are evenly distributed, contributing to a consistently tender crumb. Also, pay close attention to your oven temperature; an oven thermometer can be a valuable tool to ensure accuracy, as many home ovens can fluctuate. Over-baking is the enemy of a moist cake, so test for doneness with a wooden skewer and remove the cakes promptly once it comes out clean.
For variations, consider adding a hint of instant espresso powder (¼-½ teaspoon) to the cocoa powder in the cake batter. It won’t make the cake taste like coffee, but it will deepen the chocolate flavor and enhance the ruby color. For a different flavor profile in the frosting, a touch of almond extract (¼ teaspoon) can provide a lovely subtle nutty note. You could also experiment with different garnishes beyond traditional berries or chocolate shavings; toasted coconut flakes, edible glitter, or even a sprinkle of crushed freeze-dried raspberries can add visual appeal and textural contrast.
Finally, the crumb coat is your secret weapon for a professional-looking finish. Don’t skip this step! It seals in any loose crumbs, creating a smooth canvas for your final layer of frosting. Let it chill in the refrigerator for at least 15 minutes to set before applying the remaining frosting. This attention to detail will elevate your Ruby Velvet Bake from delicious to absolutely stunning.
Storage and Reheating
Proper storage is crucial for maintaining the freshness and quality of your Ruby Velvet Bake, especially due to the cream cheese frosting. Since the frosting contains dairy, the cake must be refrigerated. To store, place the cake on a plate or cake stand and cover it loosely with plastic wrap or an airtight cake dome. This prevents the cake from drying out and absorbing odors from the refrigerator. Stored correctly, the Ruby Velvet Bake will remain fresh and delicious for up to 3-4 days in the refrigerator.
If you have individual slices, it’s best to place them in an airtight container to prevent them from drying out. This also makes it easier to grab a quick treat without disturbing the rest of the cake.
You can also freeze the Ruby Velvet Bake for longer storage. For unfrosted cake layers, wrap each cooled layer tightly in plastic wrap, then an additional layer of aluminum foil. They can be frozen for up to 1-2 months. Thaw them in the refrigerator overnight before frosting. For a fully frosted cake, it’s best to freeze it uncovered until the frosting is firm (about 1-2 hours), then wrap it tightly in plastic wrap and then foil. This prevents the plastic wrap from sticking to the frosting. Frozen frosted cake can be stored for up to 1 month. To thaw, unwrap the cake and let it sit in the refrigerator overnight, then bring it to room temperature for about an hour before serving for the best texture and flavor.
Reheating is generally not recommended for a cream cheese frosted cake. The beauty of this bake is its moist, tender crumb and creamy frosting, both of which are best enjoyed at or just below room temperature. Heating it in a microwave or oven would likely melt the frosting and alter the delicate texture of the cake, making it mushy or dry. Instead, if serving from the refrigerator, simply remove the cake about 30-60 minutes before serving to allow it to come closer to room temperature. This will soften the frosting slightly and enhance the cake’s flavor and texture, making it more enjoyable.
Frequently Asked Questions
What causes my Ruby Velvet Bake to be dry?
A dry cake is usually the result of over-baking or incorrect measuring of dry ingredients. Ensure you’re measuring flour correctly (spoon into cup, then level) and avoid over-mixing the batter, which can develop gluten and lead to a tough, dry texture. Always test for doneness with a skewer and remove the cakes from the oven as soon as it comes out clean.
Why is my cream cheese frosting too runny or too stiff?
Runny frosting often happens if the cream cheese or butter is too warm, if you’ve used low-fat cream cheese, or if the frosting has been over-mixed. To fix, chill the frosting in the refrigerator for 15-30 minutes to firm up. Stiff frosting might be due to too much powdered sugar or cold ingredients. If too stiff, add a tiny splash of milk or cream (half a teaspoon at a time) and beat until desired consistency.
Can I make this cake ahead of time?
Absolutely! The unfrosted cake layers can be baked a day or two in advance. Once completely cooled, wrap them tightly in plastic wrap and store at room temperature or refrigerate. The cream cheese frosting can also be made a day in advance and stored in an airtight container in the refrigerator; let it come to room temperature and beat briefly before using. For the best flavor and texture, assemble and frost the cake no more than 24 hours before serving, allowing it to chill in the refrigerator until needed.
What can I use instead of red food coloring for the ruby color?
For a natural alternative, you can use beetroot powder or concentrated beet juice. Be aware that these might impart a subtle earthy flavor and the resulting color may be more of a deep maroon or reddish-brown rather than a vibrant ruby. You’ll likely need to use a larger quantity than gel food coloring to achieve a noticeable hue. Always test a small amount first to gauge the color and flavor impact.