Instructions
- Preheat your oven to 400°F (200°C).
- Prepare the chicken: Pat the chicken thighs thoroughly dry with paper towels. This step is crucial for achieving crispy skin. Season both sides generously with sea salt and freshly ground black pepper.
- Prepare the rosemary butter mixture: In a small bowl, combine the melted butter, minced garlic, and 2 tablespoons of chopped fresh rosemary. Stir well to combine.
- Sear the chicken (optional but recommended for crispy skin): Heat the olive oil in a large oven-safe skillet (cast iron works wonderfully) over medium-high heat. Once hot, place the chicken thighs skin-side down in the skillet. Do not overcrowd the pan; cook in batches if necessary. Sear for 5-7 minutes, until the skin is deeply golden brown and crispy.
- Flip the chicken: Turn the chicken thighs over, skin-side up.
- Add rosemary butter and roast: Pour half of the rosemary butter mixture over the chicken thighs. Tuck the whole fresh rosemary sprigs around and under the chicken in the skillet.
- Transfer to the oven: Carefully transfer the skillet to the preheated oven.
- Bake the chicken: Roast for 20-25 minutes. After 15 minutes, baste the chicken with the pan juices and pour the remaining rosemary butter mixture over the thighs. If using, add the chicken broth to the bottom of the pan to create more sauce. Continue baking until the internal temperature of the thickest part of the chicken reaches 175°F (80°C) when measured with an instant-read thermometer. The skin should be beautifully golden and crisp.
- Rest the chicken: Once cooked, remove the skillet from the oven. If desired, stir in the fresh lemon juice into the pan sauce. Loosely tent the chicken with aluminum foil and let it rest in the skillet for 5-10 minutes. This allows the juices to redistribute, ensuring incredibly moist and tender chicken.
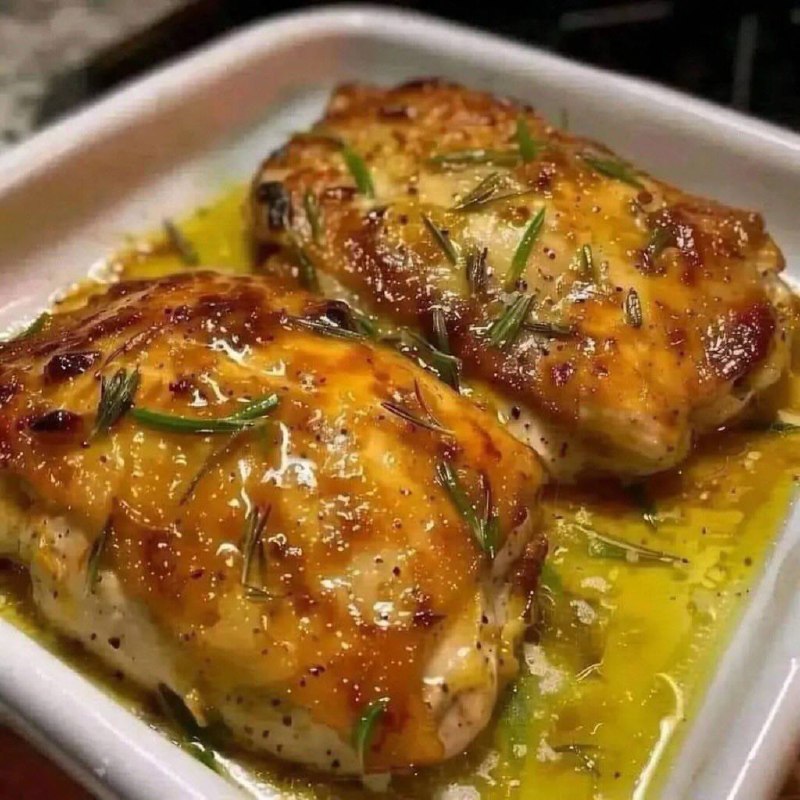
- Serve: Spoon the luscious pan sauce over the rested chicken thighs and serve immediately with your favorite sides.
Cooking Tips and Variations
For the crispiest skin, patting your chicken thighs thoroughly dry before seasoning and searing is the most important step. Any excess moisture on the skin will steam rather than crisp, preventing that coveted golden-brown crunch. When searing, ensure your skillet is hot enough and avoid overcrowding the pan. Giving each thigh enough space allows for proper air circulation and direct contact with the hot surface, leading to better browning. Don’t be shy with the heat during the initial sear; a good sizzle is what you’re looking for.
When it comes to cooking chicken thighs, don’t be afraid to cook them to a slightly higher internal temperature than chicken breasts. While chicken breasts are best at 165°F (74°C), thighs are much more forgiving and actually become more tender and flavorful when cooked to 175°F (80°C). Use an instant-read thermometer inserted into the thickest part of the thigh, avoiding the bone, to ensure perfect doneness. Afterward, resting the chicken is non-negotiable. This brief pause allows the muscle fibers to relax and reabsorb all those delicious juices, resulting in incredibly moist meat. If you cut into it too soon, those precious juices will run out onto your cutting board instead of staying in the chicken.
To enhance the flavor of your Rosemary Butter Chicken, consider adding some aromatic vegetables directly to the pan during the last 15-20 minutes of roasting. Sliced onions, halved shallots, or even thick slices of lemon can roast alongside the chicken, absorbing the buttery, herby goodness and adding another layer of flavor and texture to your meal. For a richer, more complex sauce, deglaze the pan after searing the chicken (before adding it to the oven) with about 1/4 cup of dry white wine or extra chicken broth, scraping up any browned bits from the bottom of the pan. This will add depth and extra savoriness to your pan sauce.
While rosemary is the star here, don’t hesitate to experiment with other fresh herbs. Fresh thyme, oregano, or a combination of all three would also be fantastic. For a slight smoky kick, a pinch of smoked paprika can be added to the seasoning mix. If you like a little heat, a tiny pinch of red pepper flakes in the butter mixture will add a subtle warmth without overpowering the other flavors. For a touch of sweetness and extra caramelization, a drizzle of honey or maple syrup can be added to the butter mixture before basting, creating a beautiful glaze.
Finally, make the most of that incredible pan sauce! It’s liquid gold. Spoon it generously over the chicken, your roasted vegetables, rice, mashed potatoes, or even a piece of crusty bread for dipping. This sauce is packed with flavor and is a highlight of the dish. If you find the sauce a little thin, you can transfer the pan juices to a small saucepan after removing the chicken, bring it to a simmer, and reduce it slightly until it reaches your desired consistency. You can also whisk in a small knob of cold butter at the end for an extra glossy, emulsified finish.
Storage and Reheating
To store any leftover Rosemary Butter Chicken Thighs, first allow them to cool completely to room temperature. This is important to prevent condensation, which can make the chicken soggy. Once cooled, transfer the chicken thighs and any remaining pan sauce to an airtight container. Refrigerate promptly, and consume within 3-4 days for the best quality and safety. Storing the chicken with the pan sauce helps to keep it moist and flavorful during storage.
When it comes to reheating, you have a few excellent options to ensure the chicken remains juicy and the skin (if any is left) doesn’t get rubbery. The oven is generally the best method for reheating chicken thighs, especially if you want to revive some crispiness in the skin. Preheat your oven to 325°F (160°C). Place the chicken thighs in an oven-safe dish, adding a tablespoon or two of chicken broth or water to the bottom of the dish to create some steam and prevent the chicken from drying out. Cover the dish loosely with foil and heat for 15-20 minutes, or until the chicken is heated through to an internal temperature of 165°F (74°C). For crispier skin, remove the foil for the last 5 minutes of reheating.
Alternatively, you can reheat the chicken thighs gently on the stovetop. Place the chicken and a little of the pan sauce or a splash of chicken broth in a skillet over medium-low heat. Cover the skillet and let it heat through slowly, turning occasionally, until warmed through. This method is quicker than the oven but might not yield as crispy skin. The microwave can also be used for convenience, but it’s often the least ideal method for chicken thighs as it can sometimes lead to uneven heating and a tougher texture. If using the microwave, heat in short bursts (30-60 seconds) at a time, checking for doneness, and covering the chicken with a damp paper towel to help retain moisture.
Frequently Asked Questions
Can I use boneless, skinless chicken thighs for this recipe?
Yes, you can absolutely use boneless, skinless chicken thighs for this recipe. However, the cooking time will be shorter, typically around 15-20 minutes in the oven. You will miss out on the crispy skin, but the meat will still absorb all the wonderful rosemary butter flavor. If using boneless, skinless, you can skip the initial searing step or sear it quickly on both sides for a little extra color before baking.
What can I serve with Rosemary Butter Chicken Thighs?
This dish pairs beautifully with a variety of sides. Classic options include roasted potatoes, mashed potatoes, rice pilaf, or quinoa to soak up the delicious pan sauce. For vegetables, consider roasted asparagus, green beans with garlic, a simple side salad, or steamed broccoli. Crusty bread is also fantastic for dipping into the buttery, herb-infused juices.
Can I prepare the chicken ahead of time?
You can do some prep ahead of time to make dinner even quicker. The chicken can be seasoned with salt and pepper and stored in the refrigerator for up to 24 hours. You can also prepare the rosemary butter mixture (melted butter, garlic, chopped rosemary) and keep it covered in the fridge for a day or two; you may need to gently re-melt it before use. Assembling the dish and cooking it fresh will yield the best results for crispy skin and moist chicken.
My chicken skin isn’t getting crispy. What am I doing wrong?
The most common reasons for non-crispy chicken skin are not patting the chicken dry enough before cooking, not having the pan hot enough during the initial sear, or overcrowding the pan. Ensure your chicken is thoroughly dry with paper towels, use a large skillet that allows ample space between thighs, and don’t be afraid of medium-high heat for the initial searing step. A good cast iron skillet also helps with achieving a fantastic crisp.