Instructions
- Prepare the Base: In a medium bowl, combine the graham cracker crumbs, melted butter, and granulated sugar. Mix well until all ingredients are evenly moistened.
- Add Peanut Butter and Cereal to Base: Add the ½ cup of creamy peanut butter and Rice Krispies cereal to the graham cracker mixture. Stir until well combined. The mixture should resemble wet sand.
- Press into Pan: Line an 8×8 inch baking pan with parchment paper, leaving an overhang on the sides for easy removal. Pour the graham cracker mixture into the prepared pan and press firmly and evenly into the bottom. A flat-bottomed measuring cup or spatula can help with this.
- Make the Peanut Butter Layer: In a large bowl, beat together the 1 cup of creamy peanut butter, powdered sugar, and softened butter until smooth and creamy. Add the milk and continue to beat until light and fluffy.
- Spread Peanut Butter Layer: Gently spread the peanut butter mixture evenly over the graham cracker base. Be careful not to disturb the base layer while spreading.
- Melt the Chocolate: In a heat-safe bowl set over a saucepan of simmering water (double boiler), or in the microwave in 30-second intervals, melt the chocolate chips and the 2 tablespoons of peanut butter, stirring frequently until smooth. Be careful not to overheat the chocolate, as it can seize up. If melting in the microwave, stir well after each interval, even if the chocolate doesn’t appear fully melted.
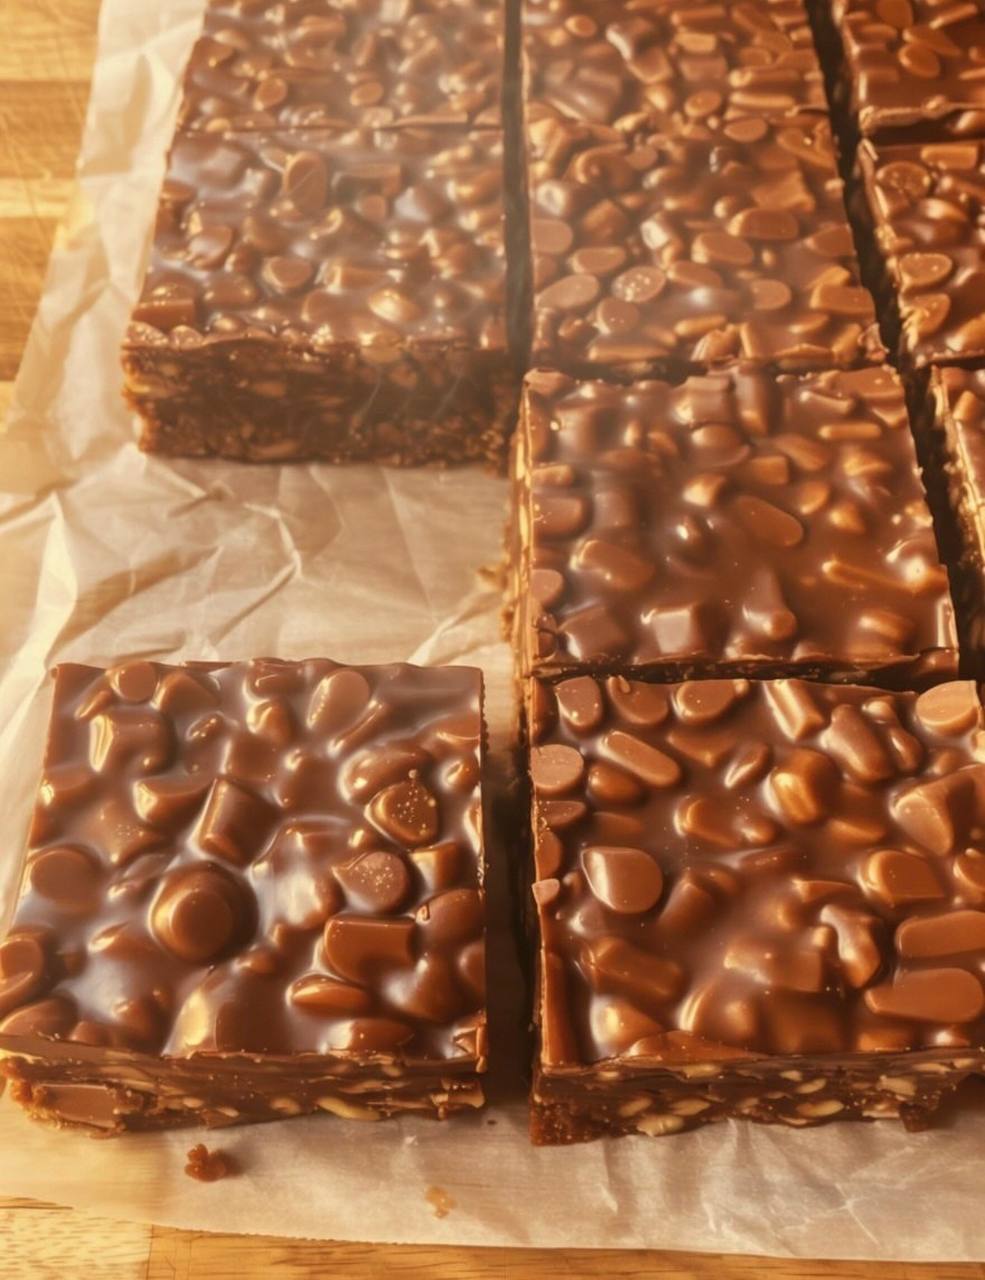
- Pour Chocolate Layer: Pour the melted chocolate mixture evenly over the peanut butter layer. Use a spatula to spread it smoothly and ensure the entire surface is covered.
- Chill: Cover the pan with plastic wrap and refrigerate for at least 2 hours, or preferably longer, until the bars are firm and the chocolate is completely set.
- Cut and Serve: Once the bars are firm, lift them out of the pan using the parchment paper overhang. Place them on a cutting board and use a sharp knife to cut them into squares or bars. For clean cuts, you can run the knife under hot water and wipe it dry between each cut.
- Enjoy! Serve immediately and enjoy your delicious No-Bake Chocolate Peanut Butter Bars!
Cooking Tips and Variations
Here are some tips and variations to ensure your no-bake bars are a success:
- Clean Cuts: For perfectly clean cuts, chill the bars thoroughly. Running a sharp knife under hot water and wiping it dry between each cut is also very helpful.
- Storage: Store the bars in an airtight container in the refrigerator to maintain their firmness and prevent the chocolate from melting.
- Freezing: These bars freeze beautifully! Wrap them individually in plastic wrap or place them in a freezer-safe container. Thaw in the refrigerator before serving.
- Type of Peanut Butter: While creamy peanut butter is recommended for the smoothest texture, you can use chunky peanut butter for added texture. Just be aware that it will make the layers slightly less smooth.
- Chocolate Choice: Semi-sweet chocolate chips are a classic choice, but you can also use milk chocolate, dark chocolate, or even white chocolate for the topping, depending on your preference.
- Add Nuts: Add chopped peanuts, walnuts, or pecans to the graham cracker base or sprinkle them on top of the chocolate layer for added crunch and flavor.
- Pretzel Crunch: Incorporate crushed pretzels into the graham cracker base for a salty-sweet twist.
- Sea Salt: A sprinkle of sea salt on top of the chocolate layer enhances the sweetness and brings out the peanut butter flavor.
- Gluten-Free Option: Use gluten-free graham crackers to make this recipe gluten-free.
- Double Chocolate: Add cocoa powder to the peanut butter layer for an extra chocolatey kick.
- Espresso Powder: A pinch of espresso powder in the chocolate layer intensifies the chocolate flavor.
- Marshmallow Fluff: Swirl marshmallow fluff into the peanut butter layer for added sweetness and a gooey texture.
Storage and Reheating
These No-Bake Chocolate Peanut Butter Bars are best stored in the refrigerator to maintain their firm texture and prevent the chocolate from melting. Place the bars in an airtight container, layering them with parchment paper if necessary, to prevent them from sticking together. They will keep in the refrigerator for up to a week.
Freezing is also a great option for longer storage. Wrap the bars individually in plastic wrap and then place them in a freezer-safe container or bag. They can be frozen for up to 2-3 months. To thaw, transfer the bars to the refrigerator and let them thaw overnight. They can also be thawed at room temperature for a quicker thaw, but be mindful of the chocolate softening.
Reheating is not necessary as these bars are meant to be enjoyed cold or at room temperature. If the bars have been frozen, allow them to thaw completely before serving. Avoid microwaving or baking the bars as this will melt the chocolate and alter the texture.
Frequently Asked Questions
Why are my bars too soft?
The most common reason for soft bars is not chilling them long enough. Make sure to chill the bars for at least 2 hours, or preferably longer, until they are firm. Also, ensure that the butter in the peanut butter layer is softened but not melted, as melted butter can result in a softer texture. Using the correct ratio of ingredients is also important.
Can I use natural peanut butter?
While you can use natural peanut butter, it may result in a slightly different texture. Natural peanut butter tends to be oilier than processed peanut butter, which can make the layers softer. If using natural peanut butter, make sure to stir it well before measuring to ensure even distribution of the oils, and you may need to add a tablespoon or two of powdered sugar to the peanut butter layer to help it firm up.
Can I use a different size pan?
Yes, you can use a different size pan, but it will affect the thickness of the bars. If using a larger pan, the bars will be thinner, and you may need to adjust the chilling time. If using a smaller pan, the bars will be thicker, and you may need to increase the chilling time. Keep in mind that the baking pan dimensions will change the nutritional information.
What if my chocolate seizes when melting?
Chocolate can seize if it comes into contact with even a small amount of water. To prevent this, make sure your bowl and utensils are completely dry when melting the chocolate. If using a double boiler, ensure that the bottom of the bowl doesn’t touch the simmering water. If melting in the microwave, use short intervals (30 seconds) and stir well after each interval to prevent overheating. If your chocolate does seize, try adding a teaspoon of vegetable oil or shortening and stirring vigorously; this can sometimes help to smooth it out.