Introduction
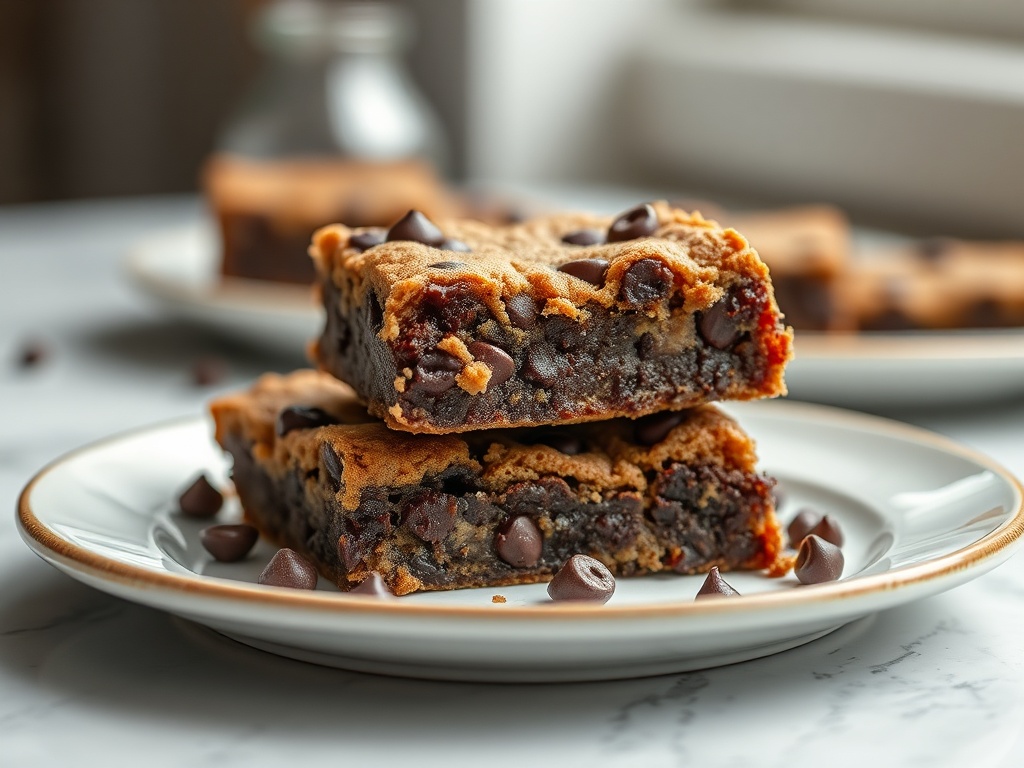
Imagine this: a warm, incredibly tender square of pure bliss, its edges a delicate golden crisp, yielding to a gloriously gooey, melt-in-your-mouth center studded with rivers of molten chocolate. That, my friends, is the promise of these Incredible Gooey Chocolate Chip Cookie Bars. Forget the fuss of scooping individual cookies; these bars deliver all the comforting, rich, and deeply satisfying flavor of your favorite chocolate chip cookie, but in a convenient, shareable, and utterly irresistible pan format. They’re the ultimate crowd-pleaser, perfect for potlucks, parties, or simply a cozy night in.
What elevates these specific cookie bars from merely “good” to “incredible” and truly “gooey” lies in a few secret weapons. We’re talking about the deep, nutty notes of brown butter, a masterful balance of sugars for that perfect chew, and a precise baking technique that ensures every bite is a symphony of soft, chewy, and gloriously melted chocolate. This isn’t just another cookie bar recipe; it’s a journey to dessert perfection, designed to deliver maximum indulgence with minimum fuss. Prepare to fall head over heels for your new go-to sweet treat.
So, whether you’re a seasoned baker or just starting your culinary adventures, get ready to dive into a recipe that promises to deliver pure joy. These bars are not just a dessert; they’re an experience – warm from the oven, cool with a glass of milk, or even a la mode with a scoop of vanilla ice cream. Let’s get baking and unlock the secrets to truly unforgettable gooey chocolate chip cookie bars!
Nutritional Information
Per serving (approximate values):
- Calories: 320
- Protein: 4g
- Carbohydrates: 45g
- Fat: 15g
- Fiber: 2g
- Sodium: 180mg
Ingredients
- 1 cup (2 sticks or 226g) unsalted butter
- 1 cup (200g) packed light brown sugar
- 1/2 cup (100g) granulated sugar
- 2 large eggs, room temperature
- 2 teaspoons pure vanilla extract (good quality)
- 2 1/4 cups (270g) all-purpose flour
- 1 teaspoon baking soda
- 1 teaspoon sea salt (or 1/2 teaspoon fine salt)
- 2 cups (340g) semi-sweet chocolate chips (or a mix of milk, semi-sweet, and dark chocolate chunks)
- Optional: Flaky sea salt for sprinkling
Instructions
- Prepare Your Pan and Preheat Oven: Preheat your oven to 350°F (175°C). Line a 9×13 inch baking pan with parchment paper, leaving an overhang on the sides. This “sling” will make it incredibly easy to lift the cooled bars out of the pan.
- Brown the Butter: In a medium-sized, light-colored saucepan, melt the unsalted butter over medium heat. Continue to cook, stirring occasionally, until the butter begins to foam, then the milk solids at the bottom will turn golden brown and smell nutty. Watch carefully to prevent burning. This process usually takes 5-8 minutes. Once browned, immediately pour the butter (including the browned bits) into a large heatproof mixing bowl and let it cool for 10-15 minutes. It should still be warm, but not scorching hot.
- Combine Sugars and Butter: To the slightly cooled brown butter, add the packed light brown sugar and granulated sugar. Whisk vigorously until well combined and smooth. The mixture should be thick and glossy.
- Add Eggs and Vanilla: Beat in the two large room temperature eggs, one at a time, mixing well after each addition until fully incorporated. Stir in the pure vanilla extract. The mixture should be light and fluffy after about 1-2 minutes of beating.
- Incorporate Dry Ingredients: In a separate medium bowl, whisk together the all-purpose flour, baking soda, and sea salt. Gradually add the dry ingredients to the wet ingredients, mixing on low speed or by hand with a spatula until just combined. Be careful not to overmix, as this can lead to tough bars. A few streaks of flour are okay.
- Fold in Chocolate Chips: Gently fold in the chocolate chips until evenly distributed throughout the dough. Reserve a small handful of chocolate chips to sprinkle on top before baking, if desired, for a prettier finish.
- Spread into Pan: Transfer the cookie dough into the prepared 9×13 inch baking pan. Using a spatula or your hands, press the dough evenly into the bottom of the pan. If you reserved some, sprinkle the remaining chocolate chips on top.
- Bake to Perfection: Bake for 25-35 minutes. The exact time will depend on your oven and your desired level of gooeyness. The edges should be set and lightly golden brown, while the center should still look slightly underbaked and a little jiggly. A toothpick inserted into the center should come out with moist crumbs, not wet batter, but also not perfectly clean. Remember, for maximum gooeyness, it’s better to slightly underbake.
- Crucial Cooling Step: This is arguably the most important step for gooey bars and clean cuts! Remove the pan from the oven and place it on a wire rack to cool completely. This means at least 2-3 hours, or even better, overnight. As the bars cool, the residual heat continues to cook the center, the fats solidify, and the sugars set, creating that perfect chewy-gooey texture and allowing for neat slicing.
- Slice and Serve: Once completely cooled, use the parchment paper overhang to lift the entire slab of cookie bars out of the pan. Place on a cutting board and slice into squares. Serve and enjoy!
Cooking Tips and Variations
Don’t Overbake! Seriously. This is the golden rule for gooey cookie bars. When the edges are set and lightly golden, but the center still looks a bit soft and jiggly, pull them out. The residual heat in the pan will continue to cook them as they cool, ensuring a perfectly moist and gooey interior. Overbaking will result in dry, crumbly bars, which is the opposite of what we’re aiming for.
The Cooling Crucible: Patience is a Virtue. We know it’s hard, but letting the bars cool completely in the pan is non-negotiable for that ultimate gooey texture and clean cuts. Attempting to slice them warm will result in a messy, crumbly heap. As they cool, the fats and sugars solidify, giving them their structural integrity and that signature chewy bite. For best results, cool them for at least 2-3 hours, or even better, overnight.
Quality Chocolate Factor: Don’t skimp on the chocolate! Use good quality chocolate chips. A mix of different types (semi-sweet, milk, dark) and even chunks or chopped chocolate bars will give you a more complex flavor profile and varying melt points, leading to glorious pockets of molten chocolate. Sprinkling a few extra chocolate chips on top of the dough before baking makes for a visually appealing finish.
Room Temperature Eggs: Ensure your eggs are at room temperature. They emulsify better with the butter and sugar, creating a smoother, more uniform batter and a better overall texture in the finished bars.
Don’t Overmix Dry Ingredients: Once you add the flour mixture, mix just until no dry streaks remain. Overmixing develops gluten, which can lead to tough, dense bars instead of the tender, chewy ones we crave.
The Power of Salt: A pinch of good quality sea salt not only balances the sweetness but also enhances the rich chocolate flavor. For an extra gourmet touch, sprinkle a tiny bit of flaky sea salt over the top of the bars immediately after they come out of the oven, or even before baking.
Oven Thermometer: Ovens can be notoriously inaccurate. An inexpensive oven thermometer can be a game-changer, ensuring you’re baking at the precise temperature called for in the recipe.
Customization Ideas:
- Nutty Bars: Fold in 1 cup of chopped pecans, walnuts, or almonds along with the chocolate chips for added crunch and flavor.
- Toffee Bits: Add 1/2 cup of toffee bits for a buttery, caramel-like chew.
- Different Extracts: Experiment with a touch of almond extract or peppermint extract for a seasonal twist.
- Sprinkles: For a festive touch, mix in some sprinkles with the chocolate chips, or sprinkle them on top before baking.
- White Chocolate & Macadamia: Swap out half the semi-sweet chips for white chocolate chips and add chopped macadamia nuts.
Storage and Reheating
Storage: Once completely cooled, store the cookie bars in an airtight container at room temperature for up to 3-4 days. For longer storage, you can refrigerate them for up to a week, though they might firm up slightly. If stacking, place a piece of parchment paper between layers to prevent sticking.
Freezing: These cookie bars freeze beautifully! Once completely cooled, cut them into individual squares. Wrap each square tightly in plastic wrap, then place them in a freezer-safe bag or container. They can be frozen for up to 2-3 months. Thaw at room temperature or reheat gently.
Reheating: For that “fresh out of the oven” experience, you can gently reheat individual cookie bars.
- Microwave: Place a bar on a microwave-safe plate and heat for 10-20 seconds, or until just warmed through and the chocolate is melty. Be careful not to overheat, or they can become tough.
- Oven: Preheat your oven to 300°F (150°C). Place bars on a baking sheet and heat for 5-10 minutes, until warmed and gooey.
Frequently Asked Questions
Why is browning the butter important?
Browning the butter, also known as making “beurre noisette,” is a crucial step that elevates the flavor of these cookie bars. As the butter cooks, the milk solids caramelize, creating a rich, nutty, and toasted aroma and taste. This process also removes some of the water content from the butter, which can contribute to a chewier texture in the final product. It adds a depth of flavor that plain melted butter simply cannot achieve.
Can I use a different size pan?
While a 9×13 inch pan is ideal for this recipe, you can use an 8×8 or 9×9 inch pan for thicker bars. However, you will need to increase the baking time significantly (likely 40-55 minutes or more) and monitor them closely to prevent burning. The cooling time remains just as critical. Conversely, using a larger pan (e.g., 10×15) will result in thinner bars and a shorter baking time.
My cookie bars aren’t gooey, what went wrong?
The most common reason for cookie bars not being gooey is overbaking. Remember the visual cues: edges set and lightly golden, center still slightly underbaked and jiggly. Pulling them out of the oven when they seem just a tiny bit underdone is key, as they continue to cook from residual heat as they cool. Another factor could be not allowing them to cool completely; the gooey texture develops as the bars set up.
Can I make this dough ahead of time?
Yes, you can! Prepare the dough as instructed, then press it into the parchment-lined pan. Cover the pan tightly with plastic wrap and refrigerate for up to 24-48 hours before baking. You might need to add a few extra minutes to the baking time if baking directly from the refrigerator, so keep an eye on them for those crucial visual cues of doneness.
Conclusion: Your New Go-To Dessert!
And there you have it – the definitive guide to creating the most Incredible Gooey Chocolate Chip Cookie Bars you’ll ever taste. We’ve unlocked the secrets to that perfect chewy-gooey texture, from the nutty depth of brown butter to the critical cooling process that makes all the difference. These bars aren’t just easy to make; they’re a testament to how simple ingredients, when treated with a little care and understanding, can transform into something truly extraordinary.
So, what are you waiting for? Gather your ingredients, preheat your oven, and prepare to be amazed. This recipe is destined to become your new go-to for every occasion, whether it’s a casual weeknight treat, a celebratory potluck, or a thoughtful homemade gift. The convenience, the shareability, and above all, the sheer deliciousness of these cookie bars make them an absolute winner every single time.
We absolutely can’t wait for you to try these! Once you’ve baked a batch, please come back and share your experience. Did you add any fun customizations? What was your favorite part? Leave a comment below, share your photos on social media, and tag us so we can see your incredible creations. Happy baking!