Introduction
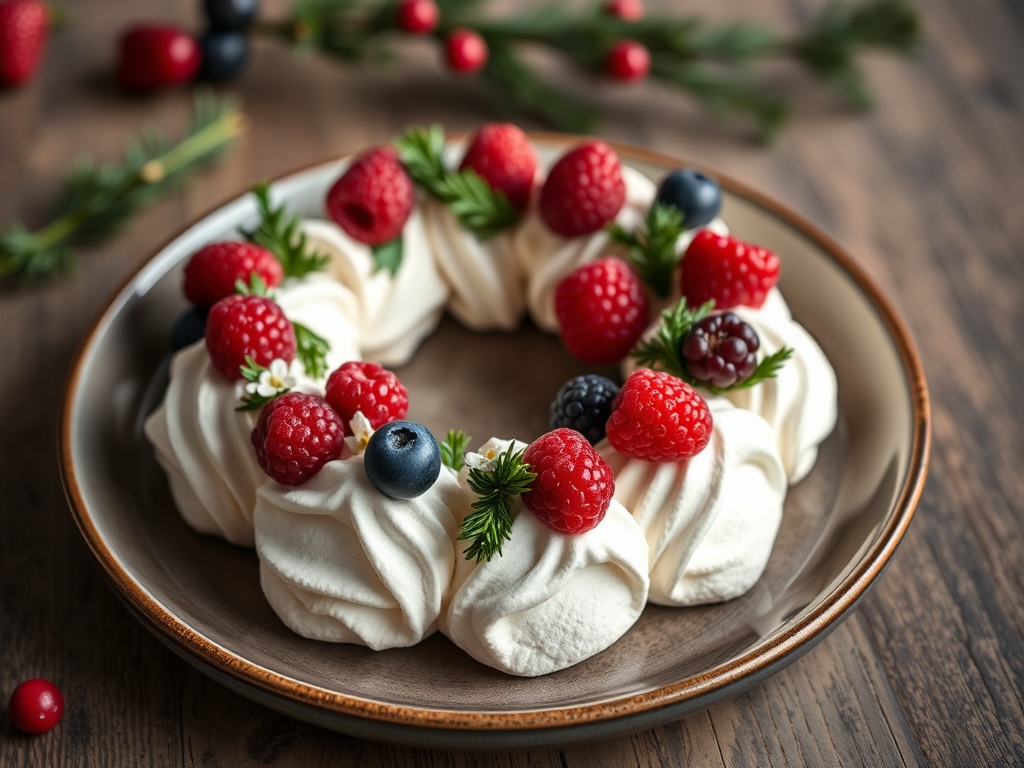
As the twinkling lights go up and the scent of pine fills the air, there’s a special magic that descends upon our kitchens. We yearn for dishes that not only tantalize the taste buds but also capture the festive spirit, becoming edible centerpieces that spark joy. This year, I’m thrilled to share a recipe that embodies all that holiday cheer in a delicate, dazzling package: Holiday Wreath Meringues with Berries & Cream. Imagine crisp, airy meringues, lightly kissed with a festive green hue, artfully piped into charming wreaths, then crowned with a cloud of whipped cream and a jewel-toned medley of fresh berries. It’s an elegant, show-stopping dessert that looks incredibly impressive yet is surprisingly achievable for any home baker.
These meringues are more than just a dessert; they’re a celebration on a plate. Their ethereal texture, a delightful contrast to the rich cream and juicy berries, makes every bite a symphony of flavors and sensations. They’re naturally gluten-free, light enough to enjoy after a hearty holiday meal, and their vibrant colors instantly brighten any dessert spread. Whether you’re hosting a grand Christmas dinner, bringing a dish to a festive potluck, or simply want to treat your family to something truly special, these Holiday Wreath Meringues are guaranteed to be a cherished addition to your seasonal traditions. Get ready to impress with this beautiful and delicious creation!
The beauty of this recipe lies in its simplicity and the dramatic impact it delivers. While meringues might seem intimidating, the process is wonderfully straightforward, relying on a few key techniques for success. The “wreath” shape is easily achieved with a piping bag, and the low-and-slow baking method ensures a perfectly crisp,melt-in-your-mouth texture. Once cooled, these delicate shells become the perfect canvas for a luxurious dollop of vanilla-scented whipped cream and a generous scattering of fresh, vibrant berries, making each meringue a miniature work of edible art. It’s a dessert that tastes as good as it looks, promising a delightful finish to any holiday gathering.
Nutritional Information
Per serving (approximate values):
- Calories: 180
- Protein: 2g
- Carbohydrates: 25g
- Fat: 8g
- Fiber: 1g
- Sodium: 25mg
Ingredients
- 4 large egg whites, at room temperature
- 1 cup (200g) granulated sugar (or superfine/caster sugar)
- 1/2 teaspoon cream of tartar
- 1 teaspoon vanilla extract
- 2-3 drops green gel food coloring (more or less for desired intensity)
- 1 cup (240ml) heavy whipping cream, very cold
- 2 tablespoons (15g) powdered sugar (confectioners’ sugar)
- 1/2 teaspoon vanilla extract
- 1 cup mixed fresh berries (strawberries, raspberries, blueberries, cranberries), washed and dried
- Optional garnishes: fresh mint leaves, edible glitter, finely chopped pistachios, extra powdered sugar for dusting
Instructions
- Preheat your oven to a very low temperature: 200°F (95°C). Line two large baking sheets with parchment paper. Using a small round cookie cutter (about 2-3 inches in diameter) or a drinking glass, lightly trace circles onto the parchment paper, leaving about 2 inches of space between each circle. Flip the parchment paper over so the pencil/pen marks are underneath (this prevents graphite from transferring to your meringues).
- Ensure your mixing bowl (preferably a stand mixer bowl) and whisk attachment are impeccably clean and grease-free. You can wipe them down with a paper towel dampened with a little lemon juice or vinegar for extra assurance.
- Add the room temperature egg whites to the clean bowl. Begin whipping on medium speed until the egg whites become foamy and opaque.
- Add the cream of tartar to the foamy egg whites and continue whipping.
- Once soft peaks begin to form (when you lift the whisk, the peaks gently flop over), gradually add the granulated sugar, one tablespoon at a time, while the mixer is running on medium-high speed. This slow addition helps the sugar dissolve properly and creates a stable meringue.
- Continue whipping on high speed until the meringue is very thick, glossy, and holds stiff, firm peaks. When you lift the whisk, the peaks should stand straight up without drooping. You should also be able to rub a small amount of meringue between your fingers and feel no sugar granules (if you do, keep whipping).
- Gently fold in 1 teaspoon of vanilla extract. Add the green gel food coloring, starting with 2 drops, and gently fold until the color is evenly distributed. Be careful not to overmix, as this can deflate the meringue.
- Fit a large piping bag with a star tip (such as Wilton 1M). Carefully transfer the green meringue into the piping bag.
- Pipe the meringues onto the prepared parchment paper, following your traced circles. Starting from the outside edge of the circle, pipe small rosettes or stars in a circular pattern, leaving a small gap in the center to create the “wreath” shape. You can pipe a second layer on top of the first for a more substantial wreath.
- Carefully transfer the baking sheets to the preheated oven. Bake for 1.5 to 2 hours, or until the meringues are completely dry, crisp to the touch, and can be easily lifted from the parchment paper. They should not brown.
- Once baked, turn off the oven and leave the meringues inside with the oven door slightly ajar. Allow them to cool completely in the oven for at least 1 hour, or ideally longer, to ensure they are perfectly crisp and to prevent cracking.
- While the meringues are cooling, prepare the whipped cream and berries. In a separate clean, cold mixing bowl, combine the very cold heavy whipping cream, 2 tablespoons of powdered sugar, and 1/2 teaspoon of vanilla extract.
- Whip on medium-high speed until soft to stiff peaks form, depending on your preference. Be careful not to over-whip, or it will turn grainy.
- Wash and gently pat dry all the fresh berries. Slice larger strawberries if needed.
- Just before serving, carefully peel the cooled meringue wreaths from the parchment paper. Place them on a serving platter.
- Pipe or spoon a generous dollop of whipped cream into the center of each meringue wreath.
- Artfully arrange the fresh berries on top of the cream and around the meringue wreath.
- For an extra festive touch, garnish with a few fresh mint leaves, a light dusting of powdered sugar (for a “snowy” effect), or a sprinkle of edible glitter or finely chopped pistachios.
- Serve immediately to enjoy the crisp texture of the meringues.
Cooking Tips and Variations
Meringue making is an art, but a very forgiving one if you follow a few golden rules. The absolute most critical tip is to ensure your mixing bowl and whisk are impeccably clean and grease-free. Even a tiny speck of fat can prevent your egg whites from whipping up properly, leading to a flat, sad meringue. For extra assurance, wipe your bowl and whisk with a paper towel dampened with lemon juice or vinegar before you begin. Another crucial element is using room temperature egg whites; the proteins in warmer egg whites are more relaxed and can incorporate more air, resulting in greater volume and a lighter meringue. Separate your eggs when they’re cold (it’s easier to separate yolks from whites cleanly), then let the whites sit out for 30 minutes to an hour to come to room temperature. When whipping, add the sugar slowly and gradually, allowing it to dissolve fully. This creates a stable, glossy meringue that holds its shape beautifully. Test for stiff peaks by lifting your whisk; the meringue should stand straight up without drooping. You can also carefully invert the bowl; if the meringue doesn’t budge, you’ve achieved perfection! The baking process itself is more about drying than cooking. A very low oven temperature for a long duration is essential for crisp, dry meringues that don’t brown. Resist the urge to open the oven door during baking, as sudden temperature changes can cause them to crack or deflate. Finally, allowing the meringues to cool completely inside the turned-off oven with the door ajar is paramount for achieving that signature crisp texture and preventing them from becoming sticky or chewy.
For creative variations, consider experimenting with different flavor profiles. Instead of vanilla, try almond extract for a nutty depth, peppermint extract for a cool, festive twist, or a hint of orange zest folded into the meringue for a bright, citrusy note. You could even swirl in a tiny bit of cocoa powder for chocolate meringues. While green is perfect for a holiday wreath, don’t limit yourself to one color! Use different food colorings to match various holidays or occasions – pink for Valentine’s Day, pastels for Easter, or even rainbow swirls for a whimsical touch. For an extra touch of indulgence, a light drizzle of melted white or dark chocolate over the cooled meringues before assembly adds a luxurious finish. If you love a bit of crunch, sprinkle finely chopped pistachios or pecans over the piped meringues before baking; the nuts will toast beautifully in the low oven. Beyond berries and cream, consider other delightful toppings: a dollop of tangy lemon curd with raspberries, a rich fruit compote, or even a small scoop of chocolate mousse could transform these wreaths into entirely new desserts. Remember, assembly should always happen just before serving to maintain the meringues’ delightful crispness.
Storage and Reheating
Unassembled meringue wreaths are quite stable and can be stored for up to a week. The key is to keep them in an airtight container at room temperature, away from any humidity. Humidity is the enemy of meringues, as they are hygroscopic and will absorb moisture from the air, turning sticky and chewy rather than crisp. Do not store them in the refrigerator before assembly, as the moisture inside the fridge will soften them. If you live in a particularly humid climate, you might find their shelf life is a bit shorter. There is no reheating necessary for meringues; they are designed to be enjoyed at room temperature.
Once the meringues are assembled with whipped cream and berries, they are best served immediately. The moisture from the whipped cream and berries will quickly start to soften the crisp meringue, diminishing its delightful texture. If you have any assembled meringues leftover, they can be refrigerated in an airtight container for a very short period, perhaps 1-2 hours, but expect the meringue to become soft. For optimal enjoyment, always assemble right before serving.
Frequently Asked Questions
Why are my meringues chewy instead of crisp?
Chewy meringues are almost always a sign of either under-baking (not dried out enough) or exposure to humidity. Ensure your oven temperature is truly low and that you bake them for the full recommended time, or even longer, until they are completely dry and can be easily lifted from the parchment. Crucially, let them cool completely inside the turned-off oven with the door ajar. Avoid making meringues on very humid days, as they will absorb moisture from the air.
Can I make meringues without cream of tartar?
While cream of tartar is highly recommended as a stabilizer that helps create stronger, more stable egg white foam, you can substitute it. For every 4 egg whites, use 1 teaspoon of white vinegar or lemon juice. These acidic ingredients serve a similar purpose in strengthening the protein structure of the egg whites, helping them hold more air and preventing collapse.
My meringue deflated after I added the food coloring. What went wrong?
Deflation after adding food coloring often happens if you’ve overmixed the meringue. Once stiff peaks are achieved, fold in the extract and food coloring very gently, using a rubber spatula. Aim for just enough folding to evenly distribute the color without knocking out all the air you’ve worked so hard to whip in. Gel food coloring is preferred over liquid, as liquid food coloring adds extra moisture that can destabilize the meringue.