Instructions
- Prepare Your Pan: Preheat your oven to 350°F (175°C). Lightly grease and flour a 9×5-inch (23×13 cm) loaf pan, ensuring all corners and sides are well coated. Tap out any excess flour.
- Combine Dry Ingredients: In a medium bowl, whisk together the all-purpose flour, cocoa powder, baking soda, baking powder, and salt. Set aside.
- Cream Butter and Sugar: In a large bowl, using an electric mixer, beat the softened butter and granulated sugar together on medium speed until light and fluffy, about 3-4 minutes. Scrape down the sides of the bowl as needed.
- Add Eggs and Vanilla: Beat in the eggs one at a time, mixing well after each addition. Stir in the vanilla extract.
- Alternate Wet and Dry: With the mixer on low speed, gradually add the dry ingredients to the wet ingredients in three additions, alternating with the buttermilk in two additions, beginning and ending with the dry ingredients. Mix until just combined after each addition. Be careful not to overmix.
- Incorporate Hot Liquid: Slowly pour in the hot coffee (or hot water) and mix on low speed until the batter is smooth and well combined. The batter will be quite thin, this is normal.
- Bake the Cake: Pour the batter into the prepared loaf pan. Bake for 50-60 minutes, or until a wooden skewer or toothpick inserted into the center of the cake comes out with only moist crumbs attached, or clean.
- Cool the Cake: Let the cake cool in the pan on a wire rack for 15-20 minutes. Then, carefully invert the cake onto the wire rack to cool completely before glazing. This is crucial for the glaze to set properly.
- Make the Ganache Glaze: While the cake is cooling, prepare the glaze. Place the finely chopped chocolate in a heatproof bowl. In a small saucepan, heat the heavy cream over medium heat until it just begins to simmer around the edges (do not boil).
- Pour and Whisk Glaze: Pour the hot cream over the chopped chocolate. Let it sit for 5 minutes without stirring to allow the chocolate to melt. Then, gently whisk from the center outwards until the mixture is smooth, glossy, and fully combined. Stir in the optional butter and vanilla extract until melted and incorporated.
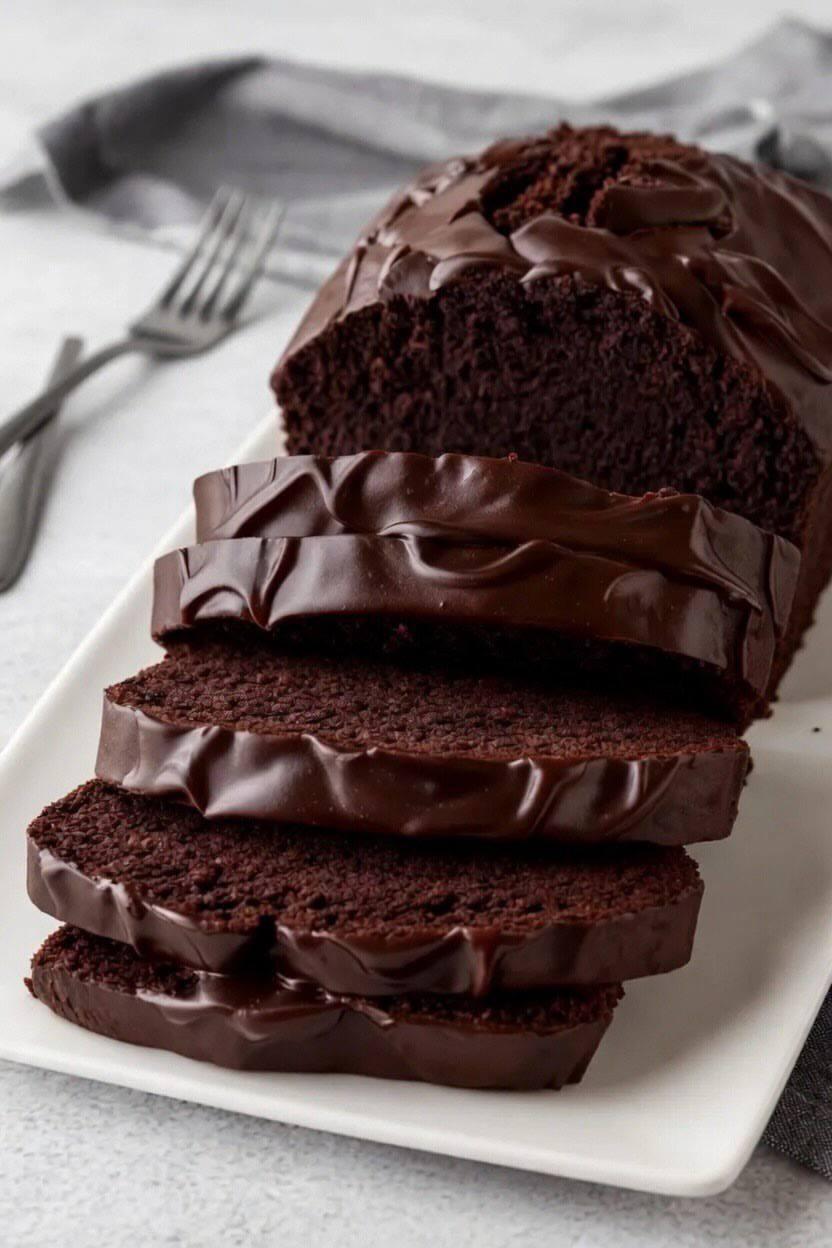
- Glaze the Cake: Once the cake is completely cool, place the wire rack with the cake over a piece of parchment paper or aluminum foil (to catch drips). Pour the warm ganache over the top of the cake, allowing it to drip attractively down the sides.
- Set the Glaze: Let the glaze set at room temperature for at least 30 minutes, or until firm to the touch. You can also refrigerate for 15-20 minutes to speed up the setting process, but bring back to room temperature before serving for best flavor and texture.
Cooking Tips and Variations
Don’t Overmix: This is perhaps the most important rule for tender cakes. Overmixing develops gluten, leading to a tough, dry texture. Mix only until ingredients are just combined.
Room Temperature Ingredients: Ensure your butter, eggs, and buttermilk are at room temperature. This allows them to emulsify better, creating a smoother batter and a more uniform crumb.
The Hot Coffee Secret: The hot coffee in the batter doesn’t make the cake taste like coffee; it intensifies the chocolate flavor, making it richer and deeper. If you prefer not to use coffee, hot water works too.
Buttermilk Substitute: No buttermilk on hand? You can easily make your own! Pour 1 cup of regular milk (dairy or non-dairy) into a liquid measuring cup, then stir in 1 tablespoon of fresh lemon juice or white vinegar. Let it sit for 5-10 minutes until it slightly curdles. Voila, homemade buttermilk!
Perfectly Greased Pan: Take the time to properly grease and flour your loaf pan. This ensures the cake releases cleanly and beautifully. For added insurance, you can line the bottom with parchment paper, leaving an overhang on the long sides to use as “handles” for lifting the cake out.
Cool Completely: Resist the urge to glaze a warm cake! A warm cake will melt the glaze, causing it to run off and create a mess rather than a beautiful, set topping. Patience is key here.
Achieving a Perfect Glossy Glaze: For the ganache, make sure your chocolate is finely chopped so it melts evenly. Don’t stir the cream and chocolate immediately; let the hot cream sit on top of the chocolate for a few minutes to do its work before whisking. Whisk gently from the center outwards to create an emulsion.
Flavor Variations:
- Espresso Boost: Add 1 teaspoon of espresso powder to the cake batter along with the dry ingredients for an even more intense chocolate flavor.
- Spicy Kick: A tiny pinch (¼ teaspoon) of cayenne pepper or chili powder in the cake batter can add a subtle, intriguing warmth that complements the chocolate beautifully.
- Orange Zest: Grate in 1 tablespoon of orange zest with the wet ingredients for a bright, citrusy note that pairs wonderfully with chocolate.
- Mint Chocolate: Add ½ teaspoon of peppermint extract to the cake batter and/or the glaze for a festive mint chocolate experience.
- Nutty Crunch: Sprinkle chopped nuts (walnuts, pecans, or almonds) over the wet glaze before it sets for added texture and flavor.
- Boozy Glaze: Replace 1-2 tablespoons of the heavy cream in the ganache with a liqueur like Kahlúa, Grand Marnier, or rum for an adult twist.
Serving Suggestions: This cake is fantastic on its own, but it also pairs beautifully with a scoop of vanilla bean ice cream, a dollop of freshly whipped cream, or a side of fresh berries (raspberries or strawberries are particularly good). A dusting of sea salt flakes over the glaze just before serving can also enhance the chocolate flavor.
Storage and Reheating
Storage at Room Temperature: This Chocolate Buttermilk Cake, especially with its ganache glaze, stores wonderfully at room temperature. Once the glaze has fully set, cover the cake loosely with plastic wrap or store it in an airtight container. It will stay fresh and moist for 3-4 days. For optimal flavor and texture, avoid refrigeration if possible, as it can dry out the cake and harden the glaze.
Storage in the Refrigerator: If you live in a very warm climate or need to extend its shelf life, you can store the cake in an airtight container in the refrigerator for up to a week. However, be aware that the cake’s texture will become denser, and the glaze will firm up considerably. To enjoy, allow individual slices to come to room temperature for at least 30 minutes before serving to soften the cake and glaze.
Freezing Instructions: This cake freezes beautifully! For best results, freeze the cake without the glaze if possible, or freeze individual slices once the glaze is fully set. Wrap the cooled cake (or slices) tightly in plastic wrap, then an additional layer of aluminum foil. You can freeze it for up to 2-3 months. To thaw, unwrap the cake and let it come to room temperature on a wire rack for several hours or overnight. If freezing unglazed, you can prepare fresh ganache after thawing.
Make-Ahead Tips:
- The dry ingredients can be measured and whisked together a few days in advance.
- The ganache glaze can be made up to 2-3 days ahead of time. Store it in an airtight container in the refrigerator. When ready to use, gently reheat it over a double boiler or in the microwave at short intervals, stirring frequently, until it reaches a pourable consistency.
- The cake itself can be baked a day in advance and stored tightly wrapped at room temperature before glazing on the day of serving.
Reheating: Generally, this cake is best served at room temperature. If you’ve refrigerated it and want to soften it slightly, you can gently warm individual slices in the microwave for 10-15 seconds. Be careful not to overheat, as this can dry out the cake and melt the glaze too much.
Frequently Asked Questions
Why is buttermilk important in this recipe?
Buttermilk plays a crucial role for several reasons. Its acidity reacts with baking soda to create carbon dioxide, which helps the cake rise and contributes to a tender, fine crumb. It also adds a subtle tangy flavor that beautifully complements and enhances the richness of the chocolate, preventing the cake from being overly sweet or one-note. Furthermore, buttermilk helps break down gluten in the flour, resulting in an incredibly moist and tender cake.
Can I use regular milk instead of buttermilk?
While you can create a buttermilk substitute by adding lemon juice or vinegar to regular milk (1 tablespoon acid per 1 cup milk, let sit for 5-10 minutes), using genuine buttermilk is recommended for the best results. The substitute works in a pinch, but real buttermilk has a thicker consistency and a more pronounced tangy flavor that contributes significantly to the cake’s unique texture and taste. Substituting directly with regular milk without the acid will alter the cake’s chemistry, resulting in a less tender crumb and potentially a different rise.
How do I know when the cake is fully baked?
The best way to check for doneness is to insert a wooden skewer, toothpick, or a thin knife into the very center of the loaf cake. If it comes out clean or with only a few moist crumbs attached, the cake is ready. If it comes out with wet batter, the cake needs more time. Also, the top of the cake should spring back slightly when gently pressed, and the edges will begin to pull away from the sides of the pan.
My ganache seized/is too thick/too thin, what went wrong?
If your ganache seized (became grainy or separated), it might be due to overheating, water getting into the chocolate, or not whisking correctly. Try adding a tablespoon of hot water or cream and whisking vigorously to bring it back. If it’s too thick, gently warm it over a double boiler or in the microwave for a few seconds, then stir in a tiny bit more warm cream until it reaches the desired consistency. If it’s too thin, let it sit at room temperature for a while to cool and thicken, or chill it in the refrigerator for 10-15 minutes, stirring occasionally, until it thickens up.