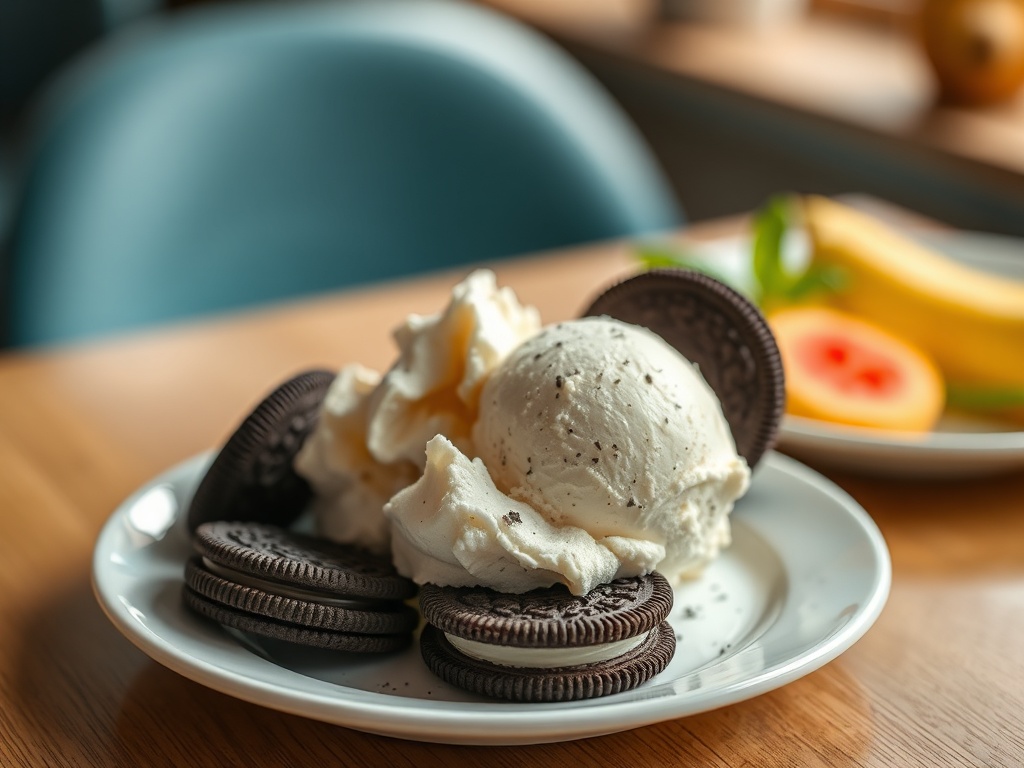
Oreo Vanilla Ice Cream: The Ultimate Guide to a Creamy, Crumbly Treat
Introduction
Imagine the smooth, velvety embrace of classic vanilla ice cream, punctuated by the delightful crunch and bittersweet allure of America’s favorite cookie. That, my friends, is the irresistible magic of Oreo Vanilla Ice Cream. It’s a symphony of textures and flavors – the cool creaminess melting on your tongue, followed by the satisfying bite of chocolatey cookie pieces, all balanced by the sweet, familiar notes of vanilla. This isn’t just a dessert; it’s a nostalgic trip, a comforting indulgence, and a guaranteed crowd-pleaser that transcends generations.
While store-bought versions certainly hit the spot, there’s an unparalleled joy and superior taste that comes from crafting your own homemade Oreo Vanilla Ice Cream. You control the quality of the ingredients, the intensity of the vanilla, and most importantly, the generous amount of those beloved Oreo chunks. This recipe isn’t just easy; it’s practically foolproof, promising a creamy, dreamy result that far surpasses anything you’ll find in the freezer aisle. Get ready to elevate your dessert game and create a treat that will have everyone asking for seconds.
In this ultimate guide, we’ll walk you through everything you need to know to make perfect homemade Oreo Vanilla Ice Cream. From understanding the science behind creamy textures to expert tips for preventing ice crystals, and even exciting variations to spark your culinary creativity, we’ve got you covered. Prepare to churn out a dessert masterpiece that combines the best of both worlds: rich vanilla and crunchy, decadent Oreos. Let’s dive in and create some delicious memories!
Nutritional Information
Per serving (approximate values, based on 8 servings per quart):
- Calories: 350-400
- Protein: 4-6g
- Carbohydrates: 35-45g
- Fat: 25-30g
- Fiber: 1-2g
- Sodium: 80-120mg
Ingredients
- 2 cups (480ml) heavy cream (cold)
- 1 cup (240ml) whole milk (cold)
- ¾ cup (150g) granulated sugar
- 1 tablespoon pure vanilla extract (or 1 teaspoon vanilla bean paste)
- ¼ teaspoon fine sea salt (optional, but recommended for flavor enhancement)
- 12-15 Oreo cookies (original variety, about 5-6 ounces), crushed
- 1 tablespoon corn syrup or 1 tablespoon vodka (optional, for smoother texture)
Instructions
- Prepare the Ice Cream Base: In a large mixing bowl, combine the cold heavy cream, cold whole milk, granulated sugar, vanilla extract (or paste), and optional fine sea salt. Whisk vigorously until the sugar is completely dissolved. If using, whisk in the optional corn syrup or vodka at this stage. Ensure there are no grainy sugar crystals remaining at the bottom of the bowl.
- Chill Thoroughly: Cover the bowl with plastic wrap and refrigerate the ice cream base for at least 4 hours, or preferably overnight. This step is crucial for achieving a smooth, creamy texture and preventing ice crystals. The colder your base, the better your ice cream will churn.
- Prepare the Ice Cream Maker: Ensure your ice cream maker’s freezer bowl has been completely frozen for at least 12-24 hours prior to churning, according to manufacturer instructions. A well-frozen bowl is essential for proper ice cream formation.
- Prepare the Oreos: While the base is chilling, prepare your Oreos. Place the 12-15 Oreo cookies in a large zip-top bag and seal it, expelling as much air as possible. Crush them using a rolling pin until you reach your desired consistency – a mix of fine crumbs and larger chunks works wonderfully for texture. Alternatively, pulse them briefly in a food processor. Set aside.
- Churn the Ice Cream: Pour the thoroughly chilled ice cream base into your pre-frozen ice cream maker bowl and churn according to the manufacturer’s instructions. This typically takes about 20-25 minutes. The mixture should thicken to the consistency of soft-serve ice cream.
- Add the Oreos: During the last 5 minutes of churning, add the crushed Oreo cookies to the ice cream maker. Allow them to mix in thoroughly.
- Freeze (Ripen) for Firmness: Once churning is complete, the ice cream will be soft. Transfer the Oreo vanilla ice cream to an airtight freezer-safe container. Press a piece of plastic wrap directly onto the surface of the ice cream to prevent freezer burn. Cover the container with a lid and freeze for at least 4-6 hours, or until firm enough to scoop. For the best texture, an overnight freeze is ideal.
- Serve and Enjoy: When ready to serve, remove the ice cream from the freezer and let it sit at room temperature for 5-10 minutes to soften slightly, making it easier to scoop. Serve in cones, bowls, or as part of your favorite dessert creations.
Cooking Tips and Variations
Achieving perfect homemade ice cream is all about understanding a few key principles. First and foremost, chilling is paramount. An ice cream base that isn’t thoroughly chilled will not freeze properly in the machine, leading to a runny, icy result. The freezer bowl itself also needs to be at its coldest; if it’s not completely frozen solid, your ice cream won’t set. Don’t over-churn your ice cream; churning too long can incorporate too much air or even start to turn the fat into butter, resulting in a grainy or greasy texture. Stop when it reaches a soft-serve consistency. For the Oreos, experiment with different crushing levels: finer crumbs will distribute more evenly, while larger chunks provide satisfying bites of cookie. Store your homemade masterpiece in an airtight container with plastic wrap pressed directly on the surface to prevent freezer burn and maintain its creamy texture. Placing it towards the back of the freezer, where temperatures are most consistent, is also a good strategy. When serving, allow it to sit at room temperature for 5-10 minutes for ideal scoopability.
For those without an ice cream maker, a No-Churn Oreo Vanilla Ice Cream variation is simple. Whip 2 cups of cold heavy cream to stiff peaks. In a separate bowl, combine one 14-ounce can of cold sweetened condensed milk with 1 tablespoon of vanilla extract and a pinch of salt. Gently fold the whipped cream into the condensed milk mixture until just combined. Fold in the crushed Oreos. Transfer to a freezer-safe container, cover, and freeze for at least 6 hours or overnight. This method relies on the air incorporated into the whipped cream and the sugar in the condensed milk to create a surprisingly creamy texture.
To elevate your Oreo ice cream, consider these flavor boosts: a teaspoon of espresso powder added to the base can deepen the chocolate flavor of the Oreos without making it taste like coffee. For a refreshing twist, add ½ teaspoon of mint extract to the base for Mint Oreo ice cream. Swirl in softened Nutella or a homemade (or store-bought) caramel sauce during the last few minutes of churning, or layer it into the container before freezing, for a rich ribbon throughout. Don’t limit yourself to Oreos; try other crushed cookies like chocolate chip, shortbread, or even graham crackers. Extra mix-ins like chocolate chips, mini marshmallows, or colorful sprinkles can add another layer of fun and texture. The possibilities are endless!
Storage and Reheating
Storing homemade ice cream properly is key to maintaining its creamy texture and preventing freezer burn. Once your Oreo Vanilla Ice Cream has finished churning and you’ve transferred it to an airtight freezer-safe container, ensure you press a layer of plastic wrap directly onto the surface of the ice cream before putting the lid on. This creates a barrier that minimizes air exposure, which is the primary cause of ice crystal formation and freezer burn. Store the container in the coldest part of your freezer, typically towards the back, where temperatures are most consistent. When stored correctly, homemade ice cream can last for up to 2-3 weeks. Beyond that, while still safe to eat, the texture may start to degrade.
Homemade ice cream does not “reheat” in the traditional sense, as it’s meant to be enjoyed frozen. However, it will be quite firm straight out of the freezer. To achieve the perfect scoopable consistency, simply remove the container from the freezer and let it sit on the counter at room temperature for 5-10 minutes before serving. This brief “tempering” period allows the ice cream to soften just enough, making it easier to scoop and enhancing its creamy mouthfeel. Avoid thawing and refreezing homemade ice cream repeatedly, as this process encourages the formation of larger ice crystals, leading to a less desirable, icy texture.
Frequently Asked Questions
Why is my homemade ice cream icy instead of creamy?
Icy ice cream is typically caused by insufficient chilling of the base before churning, an inadequately frozen ice cream maker bowl, or not enough fat or sugar in the recipe. Ensure your base is thoroughly chilled (preferably overnight), your freezer bowl is frozen solid for at least 12-24 hours, and you’re using full-fat dairy products as specified in the recipe. Rapid freezing after churning (ripening) also helps minimize large ice crystal formation.
Can I make this recipe without an ice cream maker?
Yes, you can! For a no-churn version, whip 2 cups of heavy cream to stiff peaks. In a separate bowl, whisk together one 14-ounce can of sweetened condensed milk, 1 tablespoon of vanilla extract, and a pinch of salt. Gently fold the whipped cream into the condensed milk mixture until just combined, then fold in your crushed Oreos. Transfer to a freezer-safe container, cover, and freeze for at least 6 hours or overnight.
How can I prevent my Oreos from becoming too soggy in the ice cream?
Adding the crushed Oreos towards the very end of the churning process (the last 5 minutes) minimizes their exposure to the liquid base, helping them retain some of their crunch. While they will soften over time in the freezer, this method helps preserve their texture initially. For extra crunch, you can also reserve a small amount of crushed Oreos to sprinkle on top just before serving.