Introduction
Tired of the same old chicken dinners? Prepare to elevate your weeknight meals with a dish that’s as delightful to look at as it is to eat: Golden Cheesy Chicken Roll-Ups! Imagine tender, juicy chicken breast, lovingly wrapped around a luscious, melty cheese filling, then coated in a golden, crispy crust. This isn’t just another chicken recipe; it’s a culinary hug, a dish that promises comfort, flavor, and a touch of elegance without the fuss. Perfect for busy families, a surefire hit with even the pickiest eaters, and a fantastic option for beginner cooks looking to impress, these roll-ups are about to become your new kitchen hero.
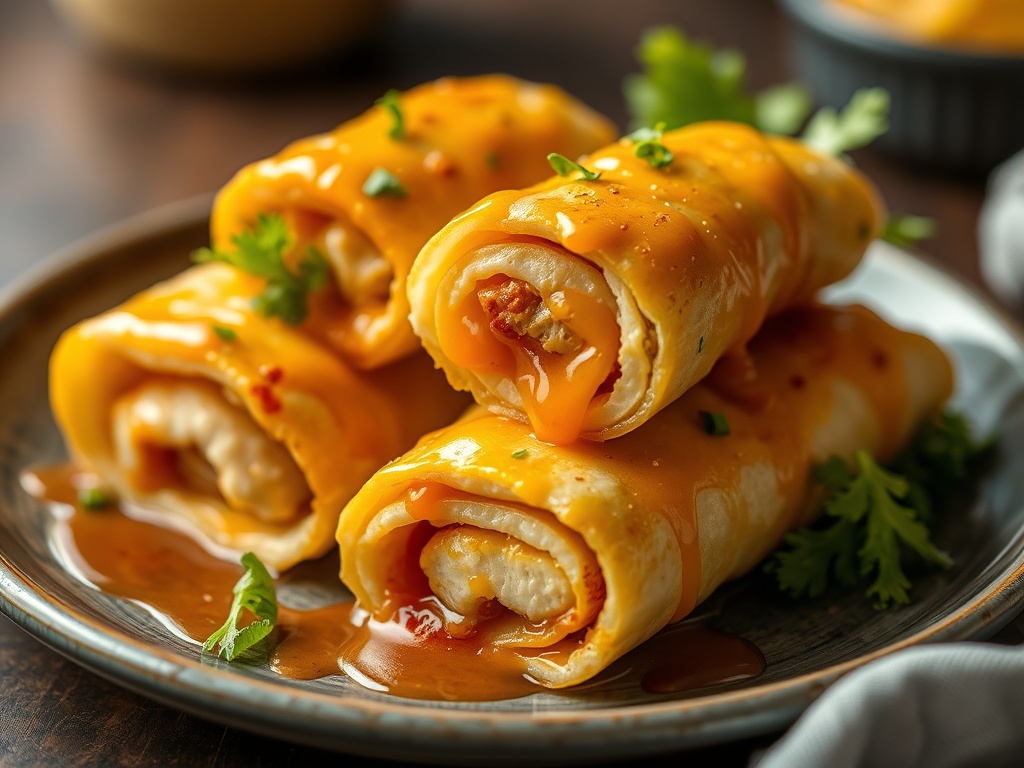
What makes our Golden Cheesy Chicken Roll-Ups truly special? It’s the perfect harmony of textures and flavors. We’ve mastered the art of keeping the chicken incredibly moist while ensuring that glorious cheesy center is perfectly gooey and flavorful. The secret lies in a few simple techniques that guarantee every bite is a revelation – from the satisfying crunch of the golden exterior to the tender chicken and the explosion of warm, savory cheese. Forget dry, bland chicken; this recipe is designed to deliver maximum juiciness and an irresistible cheesy pull every single time.
This recipe isn’t just delicious; it’s also incredibly versatile and surprisingly easy to prepare. Whether you’re planning a cozy family dinner, hosting a casual get-together, or simply craving something comforting after a long day, these roll-ups fit the bill. We’ll guide you through each step, offering expert tips and tricks to ensure your success. Get ready to transform humble chicken breasts into a golden, cheesy masterpiece that will have everyone asking for seconds. Let’s dive into the magic of Golden Cheesy Chicken Roll-Ups!
Nutritional Information
Per serving (approximate values):
- Calories: 480
- Protein: 45g
- Carbohydrates: 25g
- Fat: 22g
- Fiber: 2g
- Sodium: 680mg
Ingredients
For the Chicken:
- 4 boneless, skinless chicken breasts (about 6-8 oz each)
- 1/2 teaspoon salt
- 1/4 teaspoon black pepper
For the Cheesy Filling:
- 4 oz cream cheese, softened
- 1/2 cup shredded mozzarella cheese
- 1/4 cup shredded sharp cheddar cheese
- 2 tablespoons grated Parmesan cheese
- 1 clove garlic, minced
- 1 tablespoon fresh parsley, chopped
- 1/4 teaspoon onion powder
- Pinch of red pepper flakes (optional, for a little kick)
For the Golden Coating:
- 1 cup plain breadcrumbs (or panko for extra crispiness)
- 1/4 cup grated Parmesan cheese
- 1/2 teaspoon garlic powder
- 1/4 teaspoon paprika
- 1/4 teaspoon dried Italian seasoning
- 1/4 teaspoon salt
- 1/8 teaspoon black pepper
- 2 large eggs, beaten
- 2 tablespoons milk or water
- 3 tablespoons unsalted butter, melted (or olive oil)
For Baking:
- Cooking spray or additional melted butter/oil for the baking dish
Instructions
- Prepare the Chicken: Preheat your oven to 375°F (190°C). Lightly grease a baking dish (9×13 inches works well) with cooking spray or melted butter. Place each chicken breast between two sheets of plastic wrap. Using a meat mallet or the flat side of a rolling pin, pound the chicken breasts to an even thickness of about 1/4 to 1/2 inch. Season both sides of the pounded chicken with salt and black pepper. Remove the plastic wrap.
- Make the Cheesy Filling: In a medium bowl, combine the softened cream cheese, mozzarella, cheddar, grated Parmesan, minced garlic, chopped fresh parsley, onion powder, and optional red pepper flakes. Mix well until all ingredients are thoroughly combined and the mixture is smooth.
- Assemble the Roll-Ups: Lay one pounded chicken breast flat on a clean surface. Spoon about 2-3 tablespoons of the cheesy filling onto one end of the chicken breast, spreading it evenly but leaving a small border around the edges. Carefully roll the chicken breast tightly from the filling end, enclosing the cheese. Secure the roll-up with one or two toothpicks to prevent it from unrolling during baking. Repeat with the remaining chicken breasts and filling.
- Prepare the Coating Station: Set up a dredging station. In a shallow dish, whisk together the beaten eggs and milk (or water). In another shallow dish, combine the breadcrumbs, 1/4 cup grated Parmesan, garlic powder, paprika, Italian seasoning, salt, and black pepper. Stir well to ensure the seasonings are evenly distributed throughout the breadcrumbs.
- Coat the Roll-Ups: Dip each chicken roll-up first into the egg mixture, ensuring it’s fully coated, letting any excess drip off. Then, transfer the roll-up to the breadcrumb mixture, pressing gently to adhere the crumbs evenly on all sides. Place the coated roll-ups seam-side down in the prepared baking dish.
- Add the Golden Finish: Drizzle or brush the tops of the coated chicken roll-ups generously with the 3 tablespoons of melted butter (or olive oil). This step is crucial for achieving that beautiful golden-brown and crispy crust.
- Bake to Golden Perfection: Bake in the preheated oven for 25-30 minutes, or until the chicken is cooked through, the cheese is melted and bubbly, and the coating is golden brown and crispy. The internal temperature of the thickest part of the chicken should reach 165°F (74°C).
- Rest and Serve: Once baked, remove the dish from the oven. Carefully remove any toothpicks from the roll-ups. Let the chicken rest for 5-10 minutes before serving. This allows the juices to redistribute, ensuring the chicken remains tender and moist.
- Serving Suggestions: Serve immediately with your favorite side dishes, such as roasted asparagus, steamed green beans, a fresh garden salad, creamy mashed potatoes, or a light pasta dish.
Cooking Tips and Variations
Pounding Hack: For a less messy experience and to prevent tearing the chicken, always place chicken breasts between two sheets of plastic wrap before pounding. Aim for an even thickness of about 1/4 to 1/2 inch for quick and uniform cooking.
Flavorful Breadcrumbs: Don’t be shy with your breadcrumb seasoning! For an extra burst of flavor, mix in dried herbs like rosemary or thyme, a pinch of smoked paprika, or even a little cayenne pepper for a subtle kick. Using panko breadcrumbs will yield an even crispier exterior.
Preventing Soggy Bottoms: To ensure an all-around crispy crust, consider baking your chicken roll-ups on a wire rack placed over a baking sheet. This allows air to circulate underneath, preventing the bottom from becoming soggy. Alternatively, ensure your baking dish isn’t overcrowded, giving each roll-up space.
Don’t Overcook! Chicken breast cooks relatively quickly. Overcooking is the arch-nemesis of juicy chicken, leading to a dry, rubbery texture. Use a meat thermometer to check for an internal temperature of 165°F (74°C) at the thickest part of the roll-up. Remove from the oven as soon as it reaches this temperature.
Resting Time is Key: After baking, let the chicken roll-ups rest for 5-10 minutes before slicing or serving. This crucial step allows the juices to redistribute throughout the meat, ensuring a more tender and flavorful result. If you cut into it too soon, the juices will run out, leaving you with drier chicken.
Tooting Toothpicks: If you’re using wooden toothpicks to secure the roll-ups, soak them in water for about 10-15 minutes before baking. This helps prevent them from charring in the oven.
Variations & Customization:
- Protein Swaps: While chicken is classic, this recipe works beautifully with thin turkey cutlets or even thin pork cutlets. Just ensure they are pounded to the same thickness.
- Filling Additions: Get creative with your cheesy center!
- Vegetables: Sautéed spinach (ensure it’s well-drained), finely chopped sun-dried tomatoes, roasted red peppers, or sautéed mushrooms can be mixed into the cheese filling.
- Herbs & Spices: Fresh basil, oregano, or chives can add a lovely aromatic touch. A pinch of nutmeg in the cheese filling can also enhance its flavor.
- Other Cheeses: Experiment with different cheese blends. Provolone, Gruyere, Fontina, or even a spicy Monterey Jack can offer unique flavor profiles.
- Meats: Cooked and crumbled bacon bits or finely diced ham can be folded into the cheese filling for a heartier roll-up.
- Coating Alternatives: For a different texture or dietary needs, try crushed crackers (like Ritz or saltines), cornflakes, or gluten-free breadcrumbs.
- Sauce Pairings: While delicious on its own, these roll-ups pair wonderfully with a variety of sauces. Consider a simple marinara, a creamy Alfredo, a tangy honey mustard, a bright lemon-butter sauce, or even a light pesto drizzle.
- Spicy Kick: For those who love a bit of heat, add a pinch of cayenne pepper or a dash of hot sauce to the cheese filling, or mix some chili powder into the breadcrumb coating.
Storage and Reheating
Make-Ahead Tips:
- Assemble and Refrigerate: You can assemble the Golden Cheesy Chicken Roll-Ups up to the point of baking. Place the coated roll-ups in your baking dish, cover tightly with plastic wrap, and refrigerate for up to 24 hours. When ready to bake, remove from the refrigerator about 20-30 minutes before baking to allow them to come closer to room temperature. You may need to add an extra 5-10 minutes to the baking time if baking directly from cold.
- Freezing Unbaked Roll-Ups: To freeze, arrange the unbaked, coated roll-ups on a baking sheet and freeze until solid (about 2-3 hours). Once frozen, transfer them to a freezer-safe bag or airtight container. They can be stored in the freezer for up to 1 month. Thaw overnight in the refrigerator before baking as directed.
Storage of Leftovers:
- Refrigerator: Store any leftover Golden Cheesy Chicken Roll-Ups in an airtight container in the refrigerator for 3-4 days. Ensure they are completely cooled before storing to prevent condensation.
Reheating Instructions:
- Oven Reheating (Recommended for Crispiness): For best results and to maintain the crispy coating, reheat the roll-ups in a preheated oven. Place them on a baking sheet and bake at 350°F (175°C) for 15-20 minutes, or until heated through and the coating has re-crisped. If they seem to be browning too quickly, you can loosely tent them with foil.
- Microwave Reheating (For Speed, but Less Crisp): If you’re short on time, you can reheat individual roll-ups in the microwave. Place on a microwave-safe plate and heat on medium power for 1-2 minutes, or until warmed through. Be aware that the coating will likely lose its crispiness and the cheese might become very soft.
- Air Fryer Reheating: For a quick re-crisp, place leftover roll-ups in an air fryer basket in a single layer. Air fry at 350°F (175°C) for 5-8 minutes, checking periodically, until hot and crispy.
Frequently Asked Questions
What kind of chicken is best for this recipe?
Boneless, skinless chicken breasts are ideal for Golden Cheesy Chicken Roll-Ups. Their lean nature and ability to be pounded thin make them perfect for rolling and ensure quick, even cooking. While you could technically use chicken thighs, breasts generally provide a more consistent shape and texture for this type of dish.
How do I prevent the cheese filling from oozing out during baking?
There are a few key steps to minimize cheese leakage. First, ensure you roll the chicken tightly around the filling. Second, secure the roll-ups with toothpicks; this is crucial for holding everything in place. Third, make sure the seam of the roll-up is placed face down in the baking dish. Lastly, don’t overfill the chicken; using the recommended amount of filling helps prevent blowouts.
Can I make this recipe gluten-free?
Absolutely! To make Golden Cheesy Chicken Roll-Ups gluten-free, simply substitute regular breadcrumbs with your favorite gluten-free breadcrumbs. The rest of the ingredients are naturally gluten-free. Always double-check ingredient labels to ensure no hidden gluten in processed items like cheese or spices.
My chicken always comes out dry. How do I ensure it stays juicy?
The most important tip for juicy chicken is to avoid overcooking it. Use a meat thermometer to check for an internal temperature of 165°F (74°C) at the thickest part of the roll-up, and remove it from the oven as soon as it reaches this temperature. Also, pounding the chicken to an even thickness ensures it cooks uniformly, and allowing the cooked roll-ups to rest for 5-10 minutes before serving helps the juices redistribute, keeping the chicken moist and tender.
Can I prepare these without an egg wash?
While an egg wash provides the best adhesion for breadcrumbs and contributes to a beautiful golden crust, you can use alternatives. A thin layer of mayonnaise or Dijon mustard spread lightly over the chicken before dredging in breadcrumbs can help the coating stick. You might also try a mixture of milk or buttermilk. However, the crispiness and color might vary slightly compared to using an egg wash.
What are some good side dishes to serve with these roll-ups?
Golden Cheesy Chicken Roll-Ups are quite versatile and pair well with a variety of sides. For a balanced meal, consider serving them with roasted vegetables like asparagus, broccoli, or green beans. A fresh garden salad with a light vinaigrette also makes a great accompaniment. For heartier options, creamy mashed potatoes, rice pilaf, or a simple pasta with butter and herbs would be delicious choices.
Conclusion
There you have it – the ultimate guide to crafting Golden Cheesy Chicken Roll-Ups that are sure to become a cherished recipe in your culinary repertoire. We’ve explored every facet, from the critical step of pounding your chicken to the art of creating that irresistible cheesy filling and achieving a perfectly golden, crispy crust. This dish truly embodies the best of comfort food: it’s rich, satisfying, incredibly flavorful, and surprisingly straightforward to prepare.
We hope you feel inspired and equipped to bring this golden, cheesy goodness into your own kitchen. Whether it’s for a busy weeknight, a special family dinner, or simply a craving for something utterly delicious, these roll-ups deliver on every promise. The versatility of the recipe means you can truly make it your own, experimenting with different fillings and seasonings to suit your taste. So, what are you waiting for? Gather your ingredients, roll up your sleeves, and get ready to experience the magic of Golden Cheesy Chicken Roll-Ups.
We absolutely can’t wait to hear how your roll-ups turn out! Please share your culinary adventures, tips, and any creative variations you come up with in the comments below. Happy cooking, and may your kitchen always be filled with the aroma of delicious food!