<>
Introduction
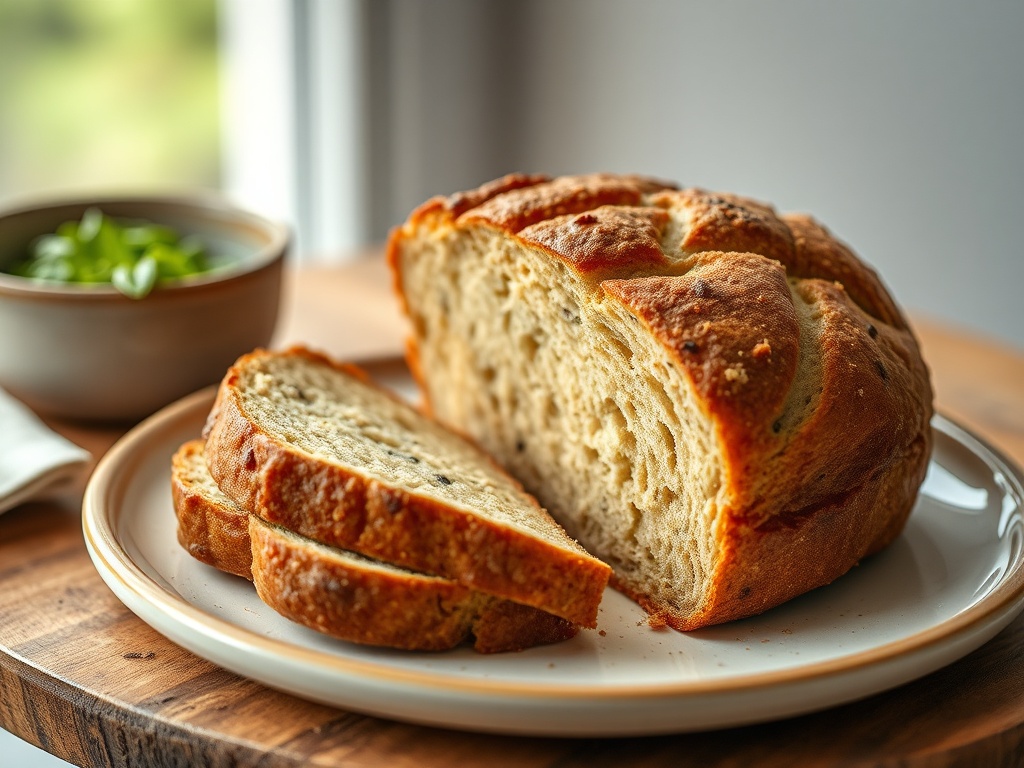
There’s a certain magic that fills the air when homemade bread is baking. The intoxicating aroma, the comforting warmth, and the sheer satisfaction of pulling a golden-brown loaf from your own oven are unparalleled. For many, the idea of baking bread from scratch feels daunting, a culinary Everest reserved for seasoned bakers. But what if I told you that achieving that perfect, crusty exterior and soft, airy interior is not only possible but genuinely foolproof? This isn’t just another bread recipe; it’s an invitation to experience the simple joy and profound satisfaction of creating something truly wonderful with your own hands.
This “Foolproof Homemade Bread” recipe is specifically designed to demystify the bread-making process, breaking it down into simple, achievable steps that even the most novice baker can master. We’ll strip away the complexities and focus on the fundamentals, ensuring you understand not just *what* to do, but *why* you’re doing it. By the end of this guide, you’ll be confidently kneading, proofing, and baking, transforming basic ingredients into a masterpiece that will impress your family and friends, and most importantly, yourself.
Whether you’re looking to impress at a dinner party, enjoy the freshest toast in the morning, or simply savor the wholesome goodness of bread made without preservatives or artificial ingredients, this recipe promises to deliver. Get ready to embark on a delightful culinary adventure that will fill your home with the most incredible scent and your belly with the most delicious bread you’ve ever tasted.
Nutritional Information
Per serving (approximate values):
- Calories: 180
- Protein: 6g
- Carbohydrates: 35g
- Fat: 2g
- Fiber: 2g
- Sodium: 300mg
Ingredients
- 3 cups (360g) All-Purpose Flour or Bread Flour, plus more for dusting
- 1 tablespoon (12g) Granulated Sugar
- 2 ¼ teaspoons (7g) Active Dry Yeast (one standard packet)
- 1 teaspoon (6g) Fine Sea Salt
- 1 ½ cups (360ml) Warm Water (105-115°F / 40-46°C)
- 2 tablespoons (30ml) Olive Oil, plus extra for greasing the bowl
Instructions
- Activate the Yeast: In a large mixing bowl, combine the warm water and granulated sugar. Sprinkle the active dry yeast over the top. Stir gently and let it sit for 5-10 minutes. The mixture should become foamy and bubbly, indicating the yeast is active. If it doesn’t foam, your water might have been too hot or too cold, or your yeast might be expired. Start again with fresh yeast and properly warmed water.
- Combine Dry Ingredients: In a separate bowl, whisk together the flour and salt. This ensures the salt is evenly distributed throughout the flour, which is crucial for flavor and yeast control.
- Mix Dough: Pour the olive oil into the activated yeast mixture. Gradually add the dry flour mixture to the wet ingredients, stirring with a wooden spoon or a sturdy spatula until a shaggy dough forms. Once most of the flour is incorporated, use your hands to bring the dough together into a rough ball.
- Knead the Dough: Turn the dough out onto a lightly floured surface. Knead for 8-10 minutes. The dough will be sticky at first, but as you knead, it will become smoother, more elastic, and less tacky. Use the heel of your hand to push the dough away from you, then fold it back over itself, rotating slightly after each push-and-fold motion. If the dough is too sticky, add a tiny bit more flour, a teaspoon at a time, but avoid adding too much, as this can make the bread dense. You’ll know it’s sufficiently kneaded when it passes the “windowpane test”—you can stretch a small piece of dough thin enough to see light through it without it tearing.
- First Rise (Bulk Fermentation): Lightly grease a large bowl with olive oil. Place the kneaded dough in the bowl, turning it once to coat the entire surface with oil. Cover the bowl tightly with plastic wrap or a clean kitchen towel. Place it in a warm, draft-free spot for 1 to 1.5 hours, or until the dough has roughly doubled in size. A slightly warm oven (turned off, with just the light on) or a sunny spot on your counter works well.
- Punch Down and Shape: Once the dough has doubled, gently punch it down to release the air. Turn the dough out onto a lightly floured surface. Gently shape it into your desired loaf shape (a round boule or an oblong bâtard). For a round loaf, gently tuck the edges under to create surface tension on top. For an oblong loaf, flatten the dough into a rectangle, fold the top third down, then the bottom third up, and then fold it in half lengthwise, pinching the seam.
- Second Rise (Proofing): Place the shaped dough onto a baking sheet lined with parchment paper or into a lightly greased loaf pan. Cover it loosely with plastic wrap or a clean kitchen towel. Let it rise again in a warm, draft-free spot for 30-45 minutes, or until it has noticeably increased in size and looks puffy. It should not quite double this time but should feel light and airy.
- Preheat Oven: About 15-20 minutes before the end of the second rise, preheat your oven to 400°F (200°C). If using a baking stone or Dutch oven, place it in the oven during preheating.
- Score and Bake: Just before baking, you can lightly score the top of the loaf with a sharp knife or razor blade (a few shallow diagonal cuts or a single slash down the center) to allow for expansion and prevent uncontrolled tearing. This is optional but adds a professional touch.
- Bake the Bread: Place the baking sheet with the dough into the preheated oven. Bake for 25-35 minutes. The baking time can vary depending on your oven and the size/shape of your loaf. The bread is done when the crust is golden brown and sounds hollow when tapped on the bottom. For a more precise check, an instant-read thermometer inserted into the center of the loaf should read 200-210°F (93-99°C).
- Cool Completely: Carefully remove the bread from the oven and transfer it immediately to a wire cooling rack. This is a critical step! Allow the bread to cool completely for at least 1-2 hours before slicing. Slicing hot bread can result in a gummy texture because the starches are still setting. Resist the urge!
Cooking Tips and Variations
For the best results, always measure your ingredients precisely, especially the flour. Using a kitchen scale for flour is highly recommended as scooping can pack too much into a cup. When activating yeast, ensure your water is warm, not hot. Water that’s too hot will kill the yeast, while water that’s too cold won’t activate it properly, leading to a dense loaf. The ideal temperature range of 105-115°F (40-46°C) feels like warm bathwater. Don’t skip the kneading; it’s essential for developing gluten, which gives bread its structure and chewiness. Under-kneading will result in a crumbly texture, while over-kneading is rare but can make the dough tough. During proofing, a warm, draft-free environment is key. If your kitchen is cool, place the bowl in a turned-off oven with just the light on, or near a warm window. The “poke test” can help determine if your dough is ready for baking after the second rise: gently poke the dough with a floured finger; if the indentation springs back slowly, it’s ready. If it springs back immediately, it needs more time. If it doesn’t spring back at all, it might be over-proofed. Finally, cooling the bread on a wire rack is non-negotiable. This allows steam to escape, preventing a soggy bottom and ensuring the crust remains crisp.
To vary your homemade bread, consider incorporating different ingredients after the first rise. For a delicious Herb Bread, add 2-3 tablespoons of finely chopped fresh rosemary, thyme, or oregano to the dough during the kneading stage. For a rustic Seeded Loaf, mix in 1/4 cup of sunflower seeds, pumpkin seeds, or flax seeds, or sprinkle them on top before baking. A Whole Wheat variation can be achieved by substituting up to half of the all-purpose flour with whole wheat flour. Keep in mind that whole wheat flour absorbs more liquid, so you might need to add a tablespoon or two of extra water until the dough feels right. For a touch of sweetness and depth, you can add 1/4 cup of dried cranberries or raisins, and a pinch of cinnamon. You can also experiment with different flours; bread flour, with its higher protein content, will yield an even chewier crumb. For a crisper crust, place a shallow pan of hot water on the bottom rack of your oven during the first 10-15 minutes of baking to create steam. This trick promotes a beautiful oven spring and a crackly crust. The possibilities are endless once you master the basic technique!
Storage and Reheating
To keep your homemade bread fresh for as long as possible, store it at room temperature in an airtight container, a bread box, or a paper bag inside a plastic bag. A plastic bag alone can make the crust soft, while a paper bag will dry it out too quickly, so a combination often works best for maintaining both crust and crumb. Avoid refrigerating bread, as this can cause it to stale faster. Stored properly, your bread will stay fresh for 3-4 days. For longer storage, homemade bread freezes beautifully. Once completely cooled, slice the loaf and place the slices in a freezer-safe bag or wrap the entire loaf tightly in plastic wrap, then foil. It can be stored in the freezer for up to 3 months. When you’re ready to enjoy it, you can take out individual slices to toast or thaw the entire loaf at room temperature.
Reheating bread brings back that delightful warmth and aroma. If you’re reheating a whole loaf from frozen, remove it from the freezer and let it thaw at room temperature for a few hours. Then, preheat your oven to 350°F (175°C) and bake the loaf for 10-15 minutes, or until warmed through and the crust is crisp again. For individual slices, a toaster or toaster oven works perfectly. From frozen, toast for a bit longer than usual. For thawed slices, a quick toast will refresh them beautifully. You can also warm slices in a dry skillet on medium heat for a few minutes per side until lightly toasted. This brings back a lovely crispness to the crust and softness to the interior, making it almost as good as freshly baked.
Frequently Asked Questions
My bread didn’t rise. What went wrong?
The most common culprits for bread not rising are inactive yeast, water that was too hot or too cold, or a drafty environment during proofing. Ensure your water is between 105-115°F (40-46°C) to properly activate the yeast without killing it. Always check your yeast’s expiration date. Also, make sure your dough is in a warm, draft-free spot during both rises. If your dough initially foamed after adding yeast, then it’s likely an issue with the proofing environment.
Why is my bread dense and heavy?
Dense bread can be a result of insufficient kneading, which means the gluten hasn’t fully developed to create a strong structure for the air pockets. It can also be caused by not allowing enough time for the dough to proof (rise) adequately, meaning the yeast hasn’t produced enough carbon dioxide to lighten the dough. Over-mixing the dough after the initial kneading can also sometimes lead to toughness, but more commonly, it’s under-kneading or under-proofing.
My crust is too hard/chewy. How can I fix this?
A crust that’s too hard or chewy can be due to overbaking or not enough moisture in the oven. Try reducing baking time slightly or lowering the oven temperature by 10-15 degrees. To add moisture, you can place a shallow pan of hot water on the bottom rack of your oven during the first 10-15 minutes of baking. This steam helps keep the crust pliable and promotes a beautiful rise. Also, ensure you cool the bread completely on a wire rack; trapping steam on a solid surface can make the bottom crust soggy, while the top becomes overly hard.
Can I make this recipe with whole wheat flour?
Yes, you can! While this recipe is optimized for all-purpose or bread flour, you can substitute up to 50% of the all-purpose flour with whole wheat flour. Keep in mind that whole wheat flour absorbs more liquid, so you may need to add an extra tablespoon or two of water to achieve the right dough consistency. The resulting loaf will be denser and have a nuttier flavor, and it may require slightly longer proofing times.