Homemade Pizza Recipe
There’s something undeniably magical about homemade pizza. Forget the lukewarm, often underwhelming delivery option; a truly great pizza begins in your own kitchen, crafted with love and tailored precisely to your cravings. This isn’t just about saving a few dollars; it’s about the unparalleled flavor of a blistered, chewy crust, the vibrant burst of fresh tomato sauce, and the perfect melt of quality cheese, all emerging from your oven. The aroma alone is enough to transport you to an Italian trattoria, and the satisfaction of pulling a golden-brown, bubbly pie from the heat is a culinary triumph.
For too long, the idea of making pizza from scratch has intimidated home cooks, conjuring images of complex doughs and specialized equipment. But I’m here to tell you that it’s far easier and more rewarding than you might imagine. The “secret” to a fantastic homemade pizza lies not in arcane rituals, but in a handful of quality ingredients and a few fundamental techniques that, once mastered, will unlock a world of delicious possibilities. Whether you’re planning a fun family night, a casual gathering with friends, or simply treating yourself to the ultimate comfort food, this comprehensive guide will equip you with everything you need to bake a pizza that rivals your favorite pizzeria.
In this article, we’ll demystify the process, starting with the foundation of any great pizza: the dough. We’ll then move on to crafting the perfect sauce, selecting the ideal cheeses, and choosing toppings that sing. Finally, we’ll cover the crucial baking steps, ensuring you achieve that coveted crispy crust and perfectly cooked toppings every time. Prepare to transform your kitchen into a pizza haven and discover the sheer joy of creating your own custom, mouth-watering masterpieces.
Nutritional Information
Per serving (approximate values, for one-quarter of a medium pizza with basic toppings):
- Calories: 350-400
- Protein: 15-20g
- Carbohydrates: 40-50g
- Fat: 12-18g
- Fiber: 2-4g
- Sodium: 600-800mg
Ingredients
For the Dough (yields two 12-inch pizzas)
- 1 ½ cups (360ml) warm water (105-115°F / 40-46°C)
- 2 ¼ teaspoons (7g) active dry yeast (one standard packet)
- 1 teaspoon granulated sugar (optional, for yeast activation)
- 3 ¾ cups (450g) bread flour, plus more for dusting
- 2 teaspoons (10g) fine sea salt
- 2 tablespoons (30ml) olive oil, plus more for bowl
For the Simple No-Cook Tomato Sauce
- 1 (28-ounce/794g) can crushed tomatoes (San Marzano recommended)
- 2 cloves garlic, minced
- 1 tablespoon olive oil
- 1 teaspoon dried oregano
- ½ teaspoon salt, or to taste
- ¼ teaspoon black pepper, or to taste
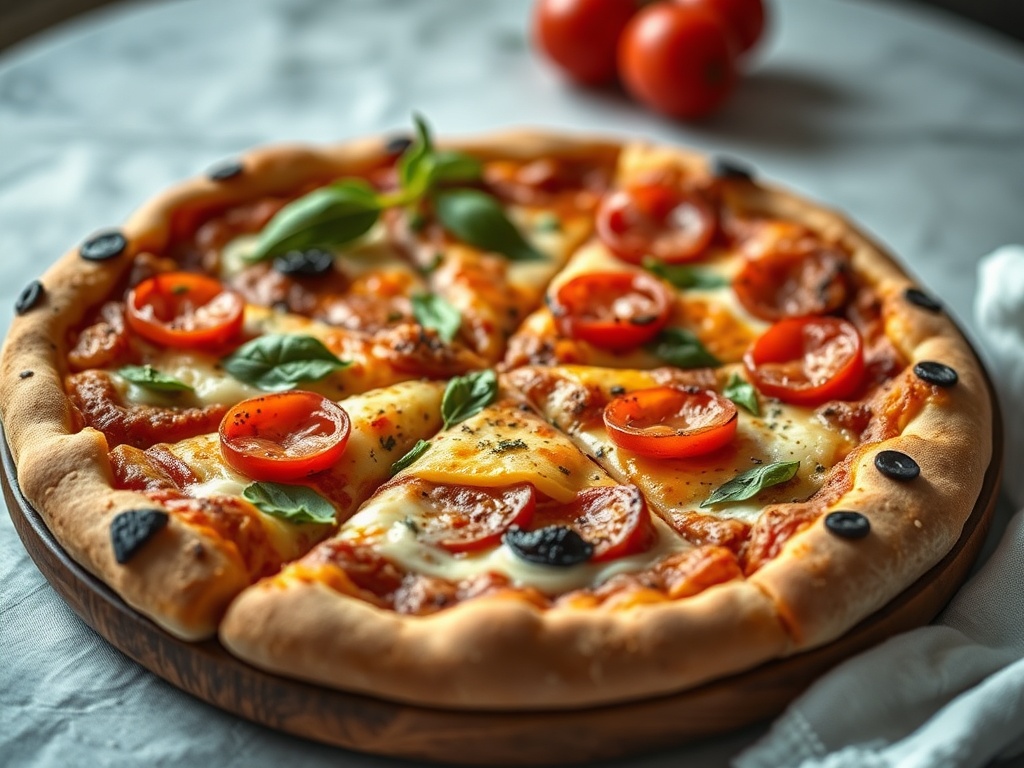
For the Toppings (suggestions for one pizza)
- 6-8 ounces (170-225g) low-moisture, whole milk mozzarella, shredded or thinly sliced
- ¼ cup grated Parmesan cheese
- Your favorite toppings:
- Pepperoni, sliced
- Cooked sausage, crumbled
- Sliced mushrooms
- Bell peppers, thinly sliced
- Onions, thinly sliced
- Black olives, sliced
- Fresh basil leaves, for garnish
- Red pepper flakes, for serving
- Extra virgin olive oil, for drizzling
Instructions
Part 1: Making the Pizza Dough
- In a large bowl or the bowl of a stand mixer fitted with the dough hook, combine the warm water, yeast, and sugar (if using). Stir gently and let sit for 5-10 minutes until foamy. This indicates the yeast is active.
- Add the bread flour, salt, and 2 tablespoons of olive oil to the yeast mixture.
- If using a stand mixer, mix on low speed for 8-10 minutes until the dough is smooth, elastic, and pulls away from the sides of the bowl. If mixing by hand, stir with a wooden spoon until a shaggy dough forms, then turn it out onto a lightly floured surface and knead for 10-15 minutes until smooth and elastic.
- Lightly oil a clean bowl. Transfer the dough to the bowl, turning it once to coat. Cover the bowl tightly with plastic wrap or a clean kitchen towel.
- Let the dough rise in a warm place for 1.5 to 2 hours, or until it has doubled in size.
- Once risen, gently punch down the dough to release the air. Divide the dough into two equal portions. You can use one immediately and refrigerate the other for up to 3 days, or freeze it for longer storage (thaw overnight in the fridge before use).
- Shape each portion into a tight ball, then cover with plastic wrap or a towel and let rest for another 15-20 minutes. This allows the gluten to relax, making the dough easier to stretch.
Part 2: Preparing the Sauce and Toppings
- While the dough is rising, prepare the sauce. In a medium bowl, combine the crushed tomatoes, minced garlic, 1 tablespoon olive oil, dried oregano, salt, and pepper. Stir well. Taste and adjust seasonings as needed. Set aside.
- Prepare your chosen toppings. If using raw meats like sausage or ground beef, cook them thoroughly beforehand. Drain any excess moisture from vegetables like mushrooms or spinach. Shred or slice your mozzarella.
Part 3: Assembling and Baking Your Pizza
- Preheat your oven to its highest setting (usually 450-550°F / 230-290°C) with a pizza stone or steel inside, if using, for at least 30-60 minutes. If you don’t have a stone/steel, simply preheat a heavy-duty baking sheet.
- Lightly dust a pizza peel (or the back of a baking sheet) with semolina flour or regular flour.
- On a lightly floured surface, take one dough ball and gently stretch it from the center outwards into a 12-inch circle. You can use your hands, a rolling pin, or even toss it if you’re feeling adventurous. Aim for an even thickness, leaving a slightly thicker edge for the crust.
- Carefully transfer the stretched dough onto your prepared pizza peel.
- Spoon about ½ cup of tomato sauce evenly over the dough, leaving a ½ to 1-inch border for the crust.
- Evenly scatter about half of the shredded mozzarella over the sauce, followed by your desired toppings. Remember, less is often more to prevent a soggy crust. Finish with a sprinkle of Parmesan cheese.
- Carefully slide the pizza from the peel onto the hot pizza stone/steel or baking sheet in the oven.
- Bake for 8-15 minutes, depending on your oven and temperature. Watch closely. The pizza is done when the crust is golden brown and puffy, the cheese is bubbly and melted, and the edges are slightly charred.
- Using the pizza peel, carefully remove the pizza from the oven.
- Transfer the pizza to a cutting board and let it rest for 2-3 minutes before slicing. This allows the cheese to set and prevents toppings from sliding off.
- Garnish with fresh basil leaves, a drizzle of extra virgin olive oil, and a sprinkle of red pepper flakes, if desired.
- Repeat the process for the second pizza.
Cooking Tips and Variations
Water Temperature is Key: For active dry yeast, aim for water between 105-115°F (40-46°C). Too cold, and the yeast won’t activate; too hot, and you’ll kill it. An instant-read thermometer is your friend here.
Don’t Be Afraid to Knead: Kneading develops the gluten, which is essential for a chewy, elastic crust. If kneading by hand, keep going until the dough is smooth and springs back when lightly poked.
The Importance of High Heat: A hot oven is crucial for achieving a crispy crust that cooks quickly without drying out. If you have a pizza stone or steel, use it! It mimics the intense heat of a professional pizza oven.
Less is More with Toppings: Overloading your pizza with too many toppings is a common mistake that leads to a soggy crust. Stick to 3-4 toppings for the best results.
Pre-cook Wet Toppings: If using vegetables that release a lot of water (like mushrooms, spinach, or onions), sauté them briefly beforehand to remove excess moisture. This prevents a watery pizza.
Overnight Cold Fermentation: For a deeper, more complex flavor and an even better crust texture, after the first rise, place your dough balls in individual oiled containers in the refrigerator for 24-72 hours. Bring to room temperature for about an hour before stretching.
Crispy Crust Secret: If your crust isn’t as crispy as you’d like, try brushing the edge with a little olive oil before baking.
Sauce Variations:
- White Pizza: Skip the tomato sauce and use a blend of ricotta, mozzarella, and Parmesan, seasoned with garlic and olive oil.
- Pesto Pizza: Spread a thin layer of pesto instead of tomato sauce.
- BBQ Chicken Pizza: Use your favorite BBQ sauce as the base, topped with cooked chicken, red onion, and mozzarella.
Cheese Blends: Experiment with different cheeses! Provolone adds a sharper flavor, while a sprinkle of aged Parmesan or Pecorino Romano adds a salty kick. Smoked mozzarella can also be a delicious addition.
Storage and Reheating
Storage: Leftover pizza is best stored in an airtight container or wrapped tightly in foil or plastic wrap in the refrigerator for up to 2-3 days.
Reheating for Best Results:
- Oven/Toaster Oven: This is the best method for retaining crispness. Preheat your oven or toaster oven to 350°F (175°C). Place pizza slices directly on the rack or on a baking sheet. Bake for 5-10 minutes, or until the cheese is bubbly and the crust is crispy.
- Stovetop: For a crispy bottom crust, place slices in a non-stick skillet over medium-low heat. Cook for 3-5 minutes, then add a few drops of water to the pan (away from the pizza) and immediately cover with a lid for 30 seconds to a minute. This steams the cheese, making it gooey again, while keeping the crust crisp.
- Microwave (least recommended): While quick, microwaving pizza often results in a soggy crust. If you must, place a glass of water in the microwave with the pizza and heat for 30-60 seconds to help keep it from drying out.
Frequently Asked Questions
What kind of flour is best for pizza dough?
Bread flour is generally recommended for pizza dough because of its higher protein content, which develops more gluten. This results in a chewier, more elastic crust that can withstand stretching and create those desirable air pockets. All-purpose flour can work in a pinch, but the texture might be slightly less chewy.
My dough isn’t rising. What went wrong?
The most common reasons for dough not rising are inactive yeast (either expired or killed by too hot water) or a too-cold environment. Ensure your water temperature is correct (105-115°F for active dry yeast) and that your yeast is fresh. Also, place the dough in a warm, draft-free spot for its rise. If your kitchen is cold, you can place the bowl in a slightly warm (turned off) oven or a sunny spot.
How do I prevent my pizza from sticking to the peel?
Generously dust your pizza peel with semolina flour or regular flour before placing the stretched dough on it. Semolina works particularly well because its coarser texture acts like tiny ball bearings, helping the pizza slide easily. Work quickly from the time you place the dough on the peel until it’s in the oven to prevent moisture from soaking into the flour and causing it to stick.
Can I make the dough ahead of time?
Absolutely! Pizza dough benefits greatly from a cold fermentation. After its initial rise, you can divide the dough into balls, lightly oil them, and store them in individual airtight containers in the refrigerator for 1-3 days. This slow rise develops more complex flavors. Just remember to take the dough out of the fridge about an hour before you plan to use it so it can come to room temperature and relax, making it easier to stretch.